
5 Composition Patterns for Star Landscape Photography: Balancing Ground and Sky
Star landscape photography changes dramatically depending on how you balance the night sky with the foreground in a single frame. Whether you want the Milky Way front and center or you are after the sense of scale that ridgelines and tree silhouettes provide, a vague plan means wasted time at a dark site with no composition to show for it.
ℹ️ Note
The specific gear and exposure values throughout this article are practical starting points drawn from field experience. Optimal settings shift with sensor characteristics, Light pollution levels, moon phase, and where your subject sits in the sky, so treat every number as a baseline you refine on location.
Three Reasons Star Landscape Compositions Fall Apart
A star landscape photograph places both the night sky and the terrestrial foreground inside the same frame. Unlike pure astrophotography that isolates celestial objects, including ridgelines, tree lines, lakes, buildings, or coastlines anchors the stars to a place and a season. That dual commitment is also what makes composition difficult. You want dark sky, yet the ground is dark too. Stars should be the hero, but the foreground needs to pull its weight. And if the horizon or a building edge tilts even slightly, the whole image feels unstable. Most star landscape failures trace back to one of these three issues.
When I am setting up a shot on site, the first things I evaluate are not exposure values but the skeleton of the image: what is the hero, is the horizon level, and is the sky-to-ground ratio working. Shoot without settling those questions and even technically correct exposures will produce unfocused results. Get them right, though, and the image gains conviction whether you are capturing pinpoint stars or painting trails with a composite stack.
- The horizon is crooked and nothing feels settled
A tilted horizon is the most immediately noticeable flaw in star landscape work. Ocean horizons, ridgelines, lake surfaces, and vertical edges of buildings all betray even minor rotation, and at night the problem sneaks past you. What looked fine on a dim rear LCD becomes painfully obvious on a desktop monitor.
Once the horizon is off, the romantic appeal of the sky cannot compete with the impression of carelessness. No matter how well the stars rendered, a leaning ground line unsettles the eye and drags down the perceived quality of the entire image. Nikon's own night-sky shooting guide recommends relying on a level indicator rather than intuition, and that advice holds especially true for star landscapes. Use the camera's electronic level, turn on the grid overlay, and check the spirit level on your tripod head. Simply getting the ground reference straight can transform a shot.
- No clear hero, so the eye wanders
The other frequent problem is "everything is in the frame, but nothing is in charge." Star landscapes carry a lot of visual information, and shooting without a declared hero almost guarantees a scattered result. Are you showing the Milky Way? A lone tree or lighthouse silhouette? Star trails from a comparative-brightening composite? Light trails from vehicles, boats, or aircraft? Without that core decision, the elements fight each other.
Consider a frame where the Milky Way stretches overhead but the lower half is an indistinct dark mass with stray city glow leaking in. There is no anchor for the eye. Contrast that with a shot where the hero is explicit. If the Milky Way is the star, the foreground is arranged to complement its arc. If a silhouette leads, its outline is positioned where it reads cleanly. If trails are the subject, the circular motion around the celestial pole or the interplay with ground-level light streaks drives the layout. Naming one thing as "the first thing I want someone to see" makes it far easier to cut what does not belong.
💡 Tip
When composition stalls, try finishing this sentence: "If someone looks at this photo for one second, the first thing I want them to notice is ___." A hero you can name with a single noun — the Milky Way, the tree line, the lighthouse, the lake reflection, the star circles — tends to produce a strong composition.
- The sky-to-ground ratio is neither here nor there
A sneaky composition killer is an indecisive split between sky and ground. Star landscapes require both, but dumping them into the frame in equal, unconsidered portions does not work. Too much sky and the ground becomes a meaningless sliver that strips the scene of any sense of place. Too much ground and the night sky fades into a backdrop, pushing the image toward ordinary nightscape territory.
This usually happens when the instinct at the site is "just get everything in." Wide-angle lenses at 24 mm and below — especially ultra-wides under 20 mm — can physically fit a lot of scene, but fitting it in and organizing it are different problems. I decide the ratio before I raise the camera: if the Milky Way or the sweep of stars is the story, sky gets the majority; if foreground silhouettes or lake reflections are doing the heavy lifting, the ground needs enough presence to deliver. Locking in the ratio first keeps framing from drifting once you are on site.
Especially early on, shooting one deliberate sky-dominant frame and one deliberate ground-dominant frame teaches more than splitting the difference. In star landscape photography, the area you allocate is itself a statement. When a composition feels off, the ratio is often the culprit before any exposure setting is.
Foundations: Hero, Ground Ratio, and Focal Length
Composition is the act of deciding what goes where inside the frame. Because star landscapes never live on sky alone, both halves need organizing or the image falls apart quickly. Three pillars worth settling up front are the hero, how the ground enters the frame, and focal length. Whether you want to feature the Milky Way, lean on a lone tree or ridgeline for drama, or trace the motion of the stars themselves, that choice cascades into where you place the horizon and which lens you reach for.
Including the ground is not just about filling empty space. A ridgeline, coastline, lake, building, or tree line introduces scale — a concrete reference for how vast the sky really is. It also creates a sense of place and, through the Milky Way's orientation or the position of constellations, encodes the season and time of night. Ground information is what turns star photography into landscape photography.
The moment ground enters the frame, though, the demand for a level horizon intensifies. Ocean horizons, lake surfaces, building verticals, and gentle skylines all expose even slight rotation at night. I trust instruments over instinct in the dark: electronic level, grid overlay, and a leveling base on the tripod. More often than not, a star landscape's perceived quality hinges on whether it stands straight before anyone evaluates the exposure.
Framing and the Rule of Thirds
Framing is not about capturing everything you can see; it is about selecting only the elements the image needs. In star landscapes, the temptation is to go wide because the sky looks amazing, but width without purpose dilutes the hero. If the sky holds the highlight, the ground should support it in a subordinate role. If the foreground is the stronger element, the sky becomes the stage rather than the star. That process of subtraction is the spine of composition.
The rule of thirds is a practical tool here. Divide the frame into a three-by-three grid and use the lines and intersections to anchor your hero and set the sky-to-ground balance. Place the horizon near the lower third line to give the sky room to breathe when the Milky Way or a broad star field is the focus. When you want a lighthouse, tree, or ridgeline to dominate, position that foreground element near one of the vertical third lines rather than dead center — the off-center placement keeps the viewer's eye moving.
Ground also serves as explanation. Sky alone can feel grand yet unanchored: the viewer cannot tell where or when the stars were seen. Even a thin strip of terrain supplies altitude, compass direction, and seasonal context. A Nikon star-landscape tutorial makes this point as well — combining ground elements elevates the photograph's appeal — and field experience confirms it. A coastline rewrites the sky differently than a ridgeline, a lake differently than a building. The type of ground you include reshapes how the stars read.
💡 Tip
If you are stuck choosing a hero, try naming one noun for the sky and one for the ground. "Milky Way" and "lone tree." "North-star circles" and "lighthouse." Compositions you can describe in two words tend to hold together on site.
Choosing Focal Length and Field of View
Wide-angle lenses are the default for star landscapes. A good starting point is 24 mm or shorter; for easier integration of foreground and sky, 20 mm or shorter opens up further options. A wide field of view lets you sweep from the foreground at your feet to the stars overhead, capturing the Milky Way's full band or a constellation's layout. The exaggerated perspective also lets nearby rocks, grass, or trees loom large while the sky stretches behind them.
Around 24 mm is a comfortable entry point. It shows plenty of sky without crushing foreground shapes, making it a natural match for coastlines and broad ridgelines. Drop below 20 mm and you gain the ability to hold strong foreground presence while keeping the sky expansive — a real advantage when you want both the Milky Way and a compelling ground element. When I am unsure on location, I start at the ultra-wide end to establish the relationship between the key elements, then tighten up only if the extra space is wasted.
Wider is not always better, though. Ultra-wide lenses fit a lot into the frame, but they also shrink the hero and can reduce the ground to a thin, featureless band. Choosing focal length based on "what do I want to show large" rather than "what can I fit" keeps compositions tight. A weak foreground shot on a very wide lens often ends up with both sky and ground feeling half-hearted.
It helps to rough out the exposure plan at this stage too. For fixed-tripod pinpoint stars, a sensible starting point is a shutter speed around 20-30 seconds, ISO 1600-6400, and the lens wide open. Star landscapes demand bright glass; f/2.8 or faster gives you breathing room. A wider field of view also means star movement is less apparent at a given shutter speed, which is one more reason wide-angle lenses dominate the genre.
Pinpoint Stars vs. Trails, and a Note on the 500 Rule
Star landscape shooting breaks down neatly into two modes: freezing stars as points and recording them as trails. Pinpoint exposures approximate what the eye sees and work well for showcasing the Milky Way or constellation shapes. A tripod-mounted camera, a relatively short exposure, and you have sky and ground in one frame. Trails, on the other hand, express the passage of time — concentric circles around the celestial pole if you aim north, sweeping arcs if you face east or west.
The key fact is that stars appear to move roughly 15 degrees per hour. Leave the shutter open on a fixed tripod and points gradually stretch into lines. The widely cited "500 rule" offers a quick estimate: divide 500 by your focal length for a rough maximum shutter speed in seconds. At 24 mm that gives about 20 seconds, a practical ballpark for star landscape initial settings.
The 500 rule is only a rough guide, however. How much trailing you actually see depends on which part of the sky you are aiming at — stars near the celestial pole move less than those near the celestial equator. It also depends on how critically you inspect the result: an image that looks sharp at web resolution may show obvious streaking when viewed at 100%. Rather than asking "does the 500 rule say I am fine," the better question is "how tight do I need the points for my final output."
For trails, you can either hold one very long exposure or stack many shorter ones using comparative-brightening compositing (lighten-layer stacking). A single long exposure is procedurally simple, but bright ground areas tend to blow out and any stray light — a headlamp, a passing car — ruins the whole frame. Comparative-brightening compositing layers many short exposures, keeping only the brightest pixel at each position, so star tracks grow smoothly and a bad frame can be dropped after the fact. An interval of about 1 second between frames keeps the trails seamless, and the technique naturally picks up vehicle headlights, boat running lights, and aircraft strobes as compositional elements.
From experience, comparative-brightening compositing is the friendlier entry point for first-time trail shooters. Ground brightness stays manageable and the process adapts to changing sky conditions. Whichever mode you choose, the decision belongs in the composition phase. Points or motion — that single choice drives how you handle the foreground, which focal length makes sense, and how you think about exposure time.
Composition Pattern 1: Rule of Thirds for a Stable Sky-Ground Split
Ratio Guidelines and Leveling
The first pattern worth learning is the rule-of-thirds split between sky and ground. Divide the frame into three horizontal bands: if the sky is the hero, start with sky 2 : ground 1; if you want to feature the terrain's shape or sweep, try sky 1 : ground 2. The important thing is to commit to that ratio before you look through the viewfinder. Decide whether this shot is about the sky or the land, then adjust your standing position forward or back. The composition organizes itself much faster that way.
What makes this pattern work is placing the horizon, ridgeline, or coastline along one of the third lines. Set the ocean horizon, a mountain ridge, or the edge of a plateau along the upper or lower third and the frame immediately stabilizes. A horizon through the center tends to feel static and explanatory; shifting it to a third line alone clarifies the hero. An OM SYSTEM star-photography article notes the same principle — the rule-of-thirds framework is a reliable stabilizer for night-sky and star-landscape compositions.
When I shoot this pattern, I level the camera first and worry about everything else second. Details on the ground vanish at night, so even minor tilt stands out against coastlines and ridgelines. The ocean is unforgiving — there is no texture to mask the lean. Ridgelines are more tolerant because of natural undulation, but on a wide beach or flat plateau a fraction of a degree ruins the feeling. Because the rule-of-thirds composition is inherently simple, getting the level right accounts for a disproportionate share of the final quality.
This pattern does have a weakness. It struggles when the foreground is cluttered — branches, rocks, fences, signs, all generating competing lines. The rule of thirds works best with broad surfaces and one strong reference line. When the ground is visually noisy, even a correct ratio can produce a flat result.
💡 Tip
The rule of thirds is less about what you include and more about where you place the line. On site, fix the horizon or ridgeline position first, then tidy the left-right margins. That sequence produces steadier frames.
Best Locations and Celestial Subjects
This pattern is strongest where the ground offers a clean horizontal line. Oceans, grasslands, marshes, plateaus, and gentle mountain ranges are natural fits — the simple ground profile lets the sky hero speak without interference. At a 2:1 sky-to-ground split, the terrain serves as a platform and the sky's breadth fills the frame naturally. Flip it to 1:2 and the plateau or coast gains presence while the stars sit quietly overhead.
Among celestial subjects, the Milky Way arc pairs especially well with this layout. A broad, horizontal landscape beneath the arching band lets the stability of the thirds frame coexist with the dynamism of the galaxy. The composition stays clean, making it a forgiving pattern for your first attempt at combining the Milky Way with a foreground. My own experience is that on nights when the sky is rich with detail, simplifying the composition actually makes the photograph stronger. The Milky Way carries enormous visual information on its own; a complex foreground on top of that creates conflict.
Rising constellations also suit this frame. Orion climbing from the east-southeast or Scorpius lifting off the southern horizon — subjects whose highlight sits near the horizon — settle neatly into a sky-heavy thirds split. Place a coastline or ridge along the lower third and the image naturally communicates where the constellation emerged from. You are not just photographing stars; you are showing their relationship with the land. To refine your site selection, pairing a Light pollution map such as Light Pollution Map with an astronomical event calendar like the one at AstroArts (astroarts.co.jp) helps match dark-sky locations to the right celestial timing.
By contrast, dense forest interiors, complicated rock formations, and areas packed with man-made structures tend to undercut this pattern. Too many lines in the foreground turn "stable" into "bland." In those environments, switching to a different composition pattern usually serves the hero better.
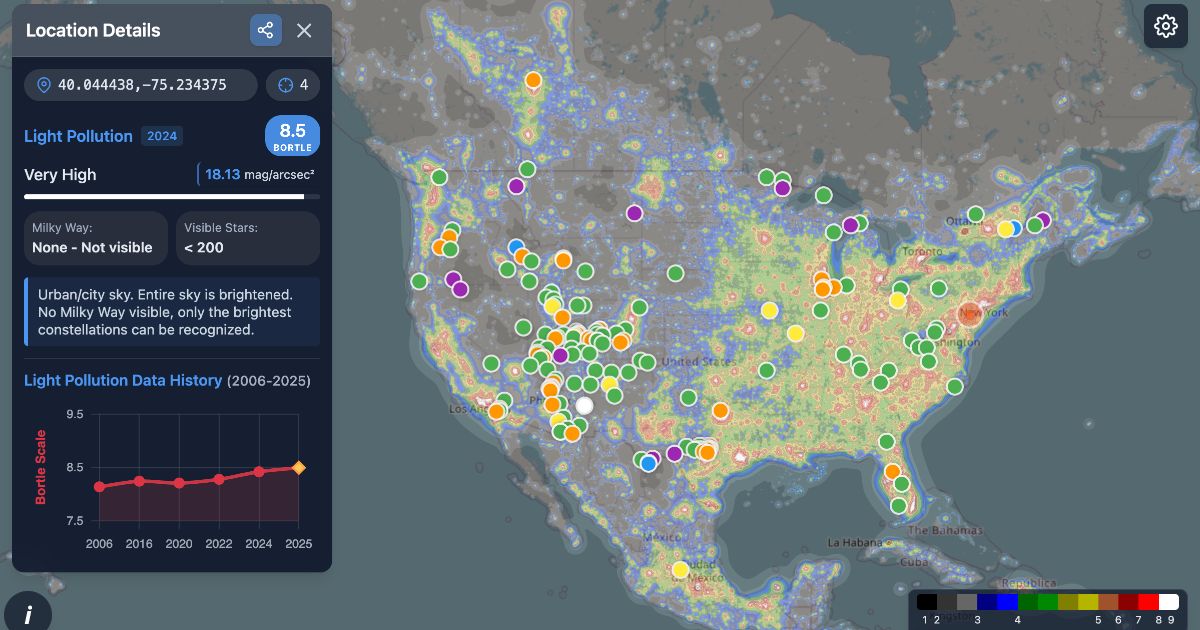
光害マップ|ボートルスケールで見る星空の暗さ (2026)
2026年版の最新光害マップ。世界中の空の暗さをボートルスケールやSQMでリアルタイムにチェックし、日本を含む天の川やオーロラ観察に最適なスポットを見つけましょう。
lightpollutionmap.appStarter Settings
This pattern accommodates sky and ground without fighting the overall balance, so 14-24 mm wide-angle lenses work smoothly and keep setup time short. Going wider can tempt you into pulling in too much foreground, which weakens the thirds line and makes the ground feel shapeless. I tend to prioritize a standing position where the thirds line looks clean, and let that dictate the focal length — finding the spot where the coastline or ridgeline falls naturally is more effective than muscling the composition with lens width.
For pinpoint stars, a practical starting point is 20 mm, f/1.8, 20-25 seconds, ISO 3200. This combination pairs well with a 2:1 sky-ground split aimed at the Milky Way or a rising constellation, delivering wide-angle breadth while keeping the exposure manageable.
For trails, plan around comparative-brightening compositing. A concrete example: 20-second frames times 270 exposures at a 1-second interval yields roughly 90 minutes of total integration. Push to 300 frames and you reach about 100 minutes, at which point battery endurance, dew management, and on-site safety planning become part of the equation.
This is genuinely the most reproducible star landscape composition. It does not require dramatic foregrounds or extreme perspective — a level horizon and a deliberate ratio are enough to make the image work. On nights when everything feels uncertain, returning to this basic form is the fastest way to sort out the relationship between sky and ground.
Composition Pattern 2: Foreground Silhouettes for a Sense of Scale
Choosing and Placing Foreground Elements
This composition is not about revealing ground detail; it is about using shape as a symbol to communicate the vastness of the sky. A lone tree, a wind turbine, a torii gate, a boulder, a ridgeline, a lighthouse, a building — anything whose outline is instantly recognizable works. By keeping the ground abstract, you avoid cluttering the image with information that competes with the stars.
When choosing a foreground subject, "interesting" matters less than whether the shape holds up in darkness. A tangled thicket reads as noise; an isolated tree reads as a clean icon. Vertical elements — wind turbines, torii gates, lighthouses — create an upward thrust that pairs naturally with the Milky Way or a rising constellation, building a sense of scale through direction. Ridgelines provide horizontal stability and serve as a broad platform to make the sky feel large. Buildings work best when the roofline or tower silhouette cuts cleanly, not when windows and signage add visual weight.
The core placement rule: do not let the silhouette overpower the sky. Silhouettes are visually strong, and going too large chokes off the stars. I find the sky's highlight first, then position the foreground along the frame's edge or lower portion, looking for the spot where it supports the sky without stealing too much area. With wide-angle lenses especially, getting too close to the foreground element inflates it far beyond expectation, leaving a looming black mass instead of a compelling symbol. Think of the silhouette as a ruler the viewer uses to measure the sky, and the placement tends to sort itself out.
A major advantage of this pattern is the ability to clean up the ground by letting it go black. Even in suburban locations with some ambient glow, committing to a silhouette rather than trying to show ground texture simplifies the frame. Light pollution often introduces uneven color casts and reflections at ground level; intentionally dropping the ground into shadow sidesteps all of that. By removing complex ground information, you push the stars forward.
💡 Tip
In a silhouette composition, the make-or-break question is "can I identify the subject from its outline alone?" Before zooming in on the live view, check the full rear-LCD image first. If the black shape reads clearly at that scale, the composition is working.
Exposure Strategy
Exposure for silhouette compositions benefits from a decisive approach. The goal is exposing for the sky and letting the foreground fall to black or near-black. A fully dark foreground is perfectly fine. Lifting shadows aggressively often introduces color noise around buildings and gritty texture across the ground, muddying a silhouette that was clean in the first place.
When I am unsure, I prioritize star rendering. I dial in an exposure where the stars look right and the sky feels present; if the ground clips to black as a consequence, I keep it. In a silhouette composition, that is not failure — it is intent. As long as the outline is legible, viewers can tell whether they are seeing a tree, a torii gate, or a mountain ridge.
This exposure philosophy is part of why the pattern works even under Light pollution. Suburban skies push warm amber or hazy white casts into the lower frame, and trying to reveal ground detail amplifies the mess. When you are not asking the exposure to recover ground information, the uneven brightness simply does not matter. Even if the sky carries some glow, a tight foreground holds the image together.
If you want a thin sliver of ground detail, the threshold is subtle: just enough tonal separation to hint at rock texture, hillside contours, or a roofline. Pushing beyond that to show real surface information usually means extending the exposure, and the trade-off is softer star points and a washed-out sky. In this pattern, restraint is the path to a finished-looking image.
Ideal Conditions and Starter Settings
This composition shines on moonless or near-moonless nights. Strong moonlight illuminates the ground, eroding the crisp edge between silhouette and sky. Conversely, dark nights around the new moon — or suburban spots where the sky is moderately dark but ground-level ambient light exists — are prime territory. Even when the sky is not pristine, a simple foreground shape like a lone tree or torii gate can carry the image.
Focal length centers on 14-24 mm, giving you room for both a wide sky and the foreground. When you want the silhouette slightly larger and more defined, 28-35 mm tightens the frame and strengthens the icon. Wide angles secure sky area; a modest telephoto punch strengthens the foreground's graphic quality. For a standalone vertical subject like a lighthouse or lone tree, I lean toward the longer end; for a ridgeline or group of structures that spread horizontally, I stay wide.
A solid starting point for pinpoint stars is 24 mm, f/2.0, 20 seconds, ISO 3200. At 24 mm, 20 seconds strikes a comfortable balance for fixed-tripod point stars, and the silhouette-oriented exposure means you can optimize for sky brightness and star count without worrying about ground recovery.
When including a person as a silhouette, stillness is non-negotiable. Even slight movement softens the outline, and at this scale the effect is obvious compared to the hard edges of a tree or building. Keep white headlamps off during the exposure; switch to red light only if illumination is needed. A human figure adds narrative tension, but the strength of this composition lives in the outline itself — an icon against the cosmos. A sharp, motionless form with no stray light is the difference between a strong frame and a near miss.
Composition Pattern 3: Leading Lines to Guide the Eye Skyward
Building a Visual Pathway with Diagonals
The essence of this pattern is turning a ground-level line into a visual on-ramp to the sky. Roads, boardwalks, fences, rivers, coastlines, farm paths, guardrails, rail tracks — lines that stretch across the terrain remain readable even in a dark frame and naturally pull the viewer's gaze from foreground to sky. Star landscapes lean toward sky dominance, and without an entry point on the ground the image can feel like empty breadth. A single leading line changes that: the eye lands on the near end, follows the line, and arrives at the celestial hero.
Diagonal placement across the frame is particularly effective. Run the line in from one of the lower corners toward the center or upper portion of the image and a flat ground plane suddenly gains depth. When I want to feature the Milky Way, I look for a line whose far end points toward the band; when the hero is the north celestial pole, I aim the line's vanishing point near Polaris. For a rising constellation, a line that terminates at the constellation's emergence point introduces anticipation — the ground says "look up, something is happening."
The line does not have to be ruler-straight. A gently curving coastline or a meandering stream creates flow just as well. What matters is committing to one line as the primary pathway. When a road, a fence, and a guardrail all compete for attention, the pull toward the sky weakens. Designate one strong line as the lead and subordinate the rest, and the composition's intent sharpens.
💡 Tip
Instead of searching for the longest line, ask where it starts and where it exits. Once you see a clear entry point and a destination connected to the sky's hero, your standing position almost selects itself.
Amplifying Depth with Wide-Angle Perspective
Leading-line compositions turn wide-angle perspective distortion into a feature. The sweet spot is 14-20 mm, where a foreground element looms large while the sky beyond still fits comfortably. Star landscapes already rely on wide glass for sky coverage, but here the added benefit is the exaggerated distance between near and far. The starting point of a boardwalk or fence appears imposingly close, then converges rapidly into the distance, generating a tangible sense of moving through the scene.
The placement tip: start the line at the very edge of the frame, especially a lower corner. A line that begins vaguely near the center loses momentum and reads as background rather than pathway. Starting from the lower-left or lower-right corner gives the eye something to snag on immediately, launching it upward. At coastal or rural locations, I step forward until the line's origin just touches the corner of the frame. A few steps can transform the strength of the perspective.
This pattern pairs well with celestial subjects that have spatial extent. The Milky Way's band is an obvious match, but the sweeping arcs of north-sky trails and constellations rising above the horizon also benefit. The ground line establishes a viewpoint — "you are standing here, looking up" — so the image communicates its highlight more directly than a simple wide sky would.
A workable starting exposure for pinpoint stars is 14 mm, f/2.8, 20 seconds, ISO 6400. At ultra-wide focal lengths, generous foreground inclusion still leaves ample sky area, and 20 seconds generally preserves point-star appearance across the frame. When you want the leading line visible all the way to its near end, a slightly elevated ISO often slots in more naturally than stretching the shutter speed.
Straightening Tilts and Clearing Clutter
Because the line is the hero, tilt control translates directly into image quality. Unless you are deliberately angling the frame, keep coastal horizons horizontal and vertical elements like fence posts and building columns plumb. A common trap is nailing the diagonal foreground line while letting the distant horizon drift a degree or two — the ground looks dynamic, but the background feels off. Intentional diagonals and accidental tilts are different things, and separating them improves the result.
A fixed sequence on site cuts the hesitation. I start by selecting the primary line, then level the distant horizon, and finally scan the frame edges for intrusions. Streetlights, signage, parked vehicles, bright vending machines, bits of rope — small man-made objects punch above their weight in night photography. Anything bright or shapeless near the leading line intercepts the viewer's gaze before it reaches the sky.
The real question is not whether clutter exists but whether it interrupts the flow of the line. If you are using a guardrail, is there a streetlight breaking into its run? If the coastline is your lead, does a white piece of debris or a cluster of footprints create an unnatural gap? If a farm path or rail track is doing the work, does a stray secondary line cut across the frame edge? Checking these things in advance means fewer elements you will wish you could clone out later.
Often, shifting your standing position by a step or two hides the offender behind the line or pushes it outside the frame. Leading-line compositions look bold but are actually sensitive to small positional changes. When the line's energy, the level, and the absence of stray brightness all align, the visual path from ground to sky clears up instantly.
Composition Pattern 4: A Tiny Subject to Magnify the Sky
Where to Place the Hero — and Why Center Rarely Works
The idea here is to make the hero deliberately small — a person, a tree, a hut, a monument — a mere dot inside a vast star field. You are not enlarging the subject; you are shrinking it so the sky's size becomes viscerally real. When I spot a summit marker or a solitary tree, my first thought is not "how big can I make this" but "how small can I place it so the sky overwhelms everything else." The smaller the subject, the more the stars stop being background and become the stage itself.
Position the subject near one of the rule-of-thirds intersections. The lower-left or lower-right area, or along the lower third line, works well. The viewer's eye catches the dot, then expands outward into the surrounding sky. The dot becomes a doorway, and the enormous negative space around it registers as sheer volume of night. In star landscapes, negative space is not weakness — it is scale.
Dead center is the placement to avoid. Centering a small subject over-stabilizes the frame; in this pattern that stability becomes monotony, and the sense of vastness and solitude fades. A centered human figure in particular reads as a posed souvenir shot, foregrounding the person rather than the sky. Shift the subject just slightly off-center and the image gains a quality of openness that lingers.
💡 Tip
In a dot composition, you are not searching for a hero so much as hunting for a small, simple shape that can absorb the sky's enormity. Lone trees, mountain huts, objects with clean outlines — the simpler the silhouette, the harder it works as a point against the stars.
Ground Ratio and Focal Length
Resist the urge to include too much ground. The hero lives on the ground, but the story is about the size gap between subject and sky. A generous ground allocation buries the dot inside surrounding terrain and tilts the image toward a nightscape of the land. For a sky-dominant composition, aim for roughly a 3:1 or even 3:0.5 sky-to-ground ratio.
A thin ground strip keeps the eye from settling — it snags on the small hero at the bottom edge and immediately lifts into the sky above. This differs from the silhouette pattern, which builds a surface along the lower frame. Here, the ground is a pedestal and the sky is the main event. If you include a ridgeline, keep it low; if you include trees, avoid dense clusters that swallow the dot.
Focal length sits comfortably in the 20-35 mm range. That bracket secures generous sky area without shrinking the subject into invisibility. Going much wider turns the hero into a speck the viewer might miss entirely; going much longer compresses the sky and undermines the vastness this pattern depends on. When the scene says "the subject barely registers, but I absolutely want the sky to dominate," I start around 24 mm and adjust from there. For pinpoint stars, 24 mm, f/1.8, 15-20 seconds, ISO 3200-6400 is a straightforward starting combination that balances star detail with the generous sky coverage this pattern needs.
Working with People and Landmarks
In this pattern, a human figure functions not as a portrait subject but as a unit of measure. One person standing beneath the night sky creates a scale reference no tree or hut can match, because the viewer already knows how tall a person is. A small silhouette under the Milky Way instantly communicates the physical dimensions of the entire scene.
If you include a person, absolute stillness is required. The smaller the figure in the frame, the more even minor movement blurs the outline. A simple pose works best — facing sideways, or gazing slightly upward — keeping the figure closer to a silhouette than a portrait. A front-facing pose that tries to show the face injects too much information and breaks the lightness of the dot composition.
Light discipline matters here too. Streetlights or headlights hitting the figure overload that spot with reality, severing the connection with the sky. Position the person away from stray light sources and have them put their phone screen away. The moment someone checks a phone at night, the blue-white glow becomes the strongest point of light in the frame and hijacks attention from the stars.
Beyond people, landmarks whose shape is self-explanatory are ideal: mountain huts, torii gates, lighthouses, monuments, isolated trees — subjects that remain identifiable even as small silhouettes. Complex building clusters or dense woodland tend to collapse into shapeless dark masses at this scale. Dot composition is a subtractive exercise; the simpler the hero's outline, the more cleanly the sky's grandeur comes through.
Composition Pattern 5: Reflections, Trails, and Light Streaks
Capturing Water Reflections — Conditions and Approach
A reflection composition brings the sky down to the ground. When a lake, a flooded rice paddy, or a tidal pool acts as a mirror, the real sky and its reflected twin create a doubled image that dramatically increases visual density. Position the Milky Way or a bright constellation vertically and you get a V-shaped composition with the original above and its mirror image below. Where the shore or horizon aligns neatly, the result can approach bilateral symmetry, vertically or horizontally. The effect can tip toward rigidity, but when it works the image carries a distinctive presence that sets it apart from the other four patterns.
The deciding factor is not the subject — it is how still the water is. Even a light ripple fragments the reflection beyond repair. When I arrive at a lake, the first thing I study is not the sky but the water's surface. Whether stars will appear in the reflection is determined right there, before exposure enters the conversation. Flooded rice paddies are shallow and mirror-smooth, and on calm nights they reflect with surprising fidelity. Tidal pools also work well under the right conditions, though the open ocean is rarely still enough; sheltered inlets and rock pools where wave energy dies off are the realistic targets.
Framing demands precision. A slightly skewed shoreline or paddy edge breaks the symmetry that makes this pattern compelling. Reflections magnify leveling errors, so getting the horizon or shoreline perfectly straight yields an outsized return. Composing for the sky alone often lets unwanted dark zones or turbid patches creep into the water half; treating the real image and its reflection as a single shape produces better results. Subjects with recognizable form — the Milky Way band, Orion's belt — hold their identity even in the reflected version, giving the composition a solid core.
💡 Tip
In a reflection shot, define the hero not as "the stars" but as "the shape that sky and water create together." A band, a V, a symmetry — deciding which figure you are building narrows your standing position quickly.
Star Trails
Recording stars as lines instead of points imprints the passage of time directly into the photograph. The sky looks still to the eye, but it is steadily turning, and trails are the most honest way to show that motion. Aim north and stars draw concentric circles around the celestial pole. Aim east or west and they trace sweeping arcs. Changing the compass bearing alone completely changes the character of the image, which means you can produce very different work from the same location.
Comparative-brightening compositing (lighten-layer stacking) is the most common trail technique. It overlays many frames and retains only the brightest pixel at each position, extending star paths into continuous lines. A single ultra-long exposure is simpler in concept, but ground areas blow out easily and stray light poisons the entire frame. Some cameras offer live composite modes that preview the stack in real time, which is very practical; without that feature, interval shooting followed by software stacking is the standard workflow.
Stars move roughly 15 degrees per hour, so total integration time determines trail length. For clearly defined lines, aim for 30 to 90 minutes of total exposure at 1-second intervals between frames. A workable starting setup: 18 mm, f/2.8, 20-25 seconds per frame, ISO 800-1600, fired continuously with a 1-second gap. A wide field of view aimed at the north celestial pole reveals broad circles, while an east-west orientation lets you juxtapose the arcing trails against terrestrial lines and structures.
Long sessions make camera logistics part of the composition plan. Most cameras cap their standard shutter speed at 30-60 seconds, so multi-minute expressions require a remote release or built-in intervalometer. Beyond exposure mechanics, fog and dew become the primary threats after midnight. A fogged front element does not just ruin one frame; it silently invalidates every subsequent shot until you notice. On trail nights, I worry about the lens heater and battery budget before I worry about exposure. Past the 30-minute mark, that preparation gap translates directly into a quality gap.
Vehicle, Boat, and Aircraft Light Trails
Trails are not exclusive to stars. On the ground, headlights and taillights, ship running lights, and the blinking strobes of aircraft become strong linear elements in a night frame. Treating these as accidents to avoid is a missed opportunity; embracing them from the start broadens what a star landscape can be. A stream of car lights flowing beneath a bridge, a ship crossing a bay, an air corridor tracing a line above the horizon — each becomes a secondary leading line that connects sky and ground.
In comparative-brightening compositing and live composite modes, ground-level light trails accumulate automatically. The technique is often thought of as a star-only tool, but in practice every bright moving object in the frame becomes a line, so folding ground motion into the composition plan pays off. At a coastal location, factor in shipping routes; near a city, consider traffic volume; close to an airport, track approach paths. Night photography is often associated with stillness, but in a trail composition, anticipating movement is part of the shooting process.
The mental model is to avoid locking onto a single hero. Star circles as the primary element, with a single red car-light streak across the bottom edge, inject human presence and a sense of distance. Flip the emphasis — make the harbor's ship trails the lead, overlay short star arcs above — and sky and sea begin to echo each other. Aircraft trails add a near-linear, artificial geometry that contrasts with the organic curves of star rotation. Intentional light streaks are not noise; they are the real rhythm of the night landscape.
Compositionally, how far each trail extends changes the feel. Cars follow road curves; ships hold a distance from shore; aircraft occupy a particular altitude band. Positioning these so they do not collide with star trails is the practical challenge. Both sky and ground produce lines, and too many of them overwhelm the frame. Decide on location whether one accent trail is enough or whether you are layering multiple streaks, and the composite will stay coherent. At coastal or hilltop sites, I think in terms of melody and accompaniment: which line carries the tune, and which fills in behind it. A touch of ground motion woven into the sky's time-lapse expression is often what lifts a photograph from record to art.
Composition Quick-Reference Table
Settings at a Glance
Once you have chosen a composition on site, the next decision point is usually "do I shoot for pinpoint stars, commit to trails, or work with moonlight." Having a single reference that ties composition to starting settings speeds things up. The table below organizes the five patterns from this article into a baseline you can consult in the field.
| Composition Pattern | Mode | ISO | Shutter | Aperture | Focal Length | Suited Locations |
|---|---|---|---|---|---|---|
| Rule-of-thirds sky-ground split | Pinpoint | 1600-3200 | 20-30 s | f/2.8 or faster | 14-24 mm | Coast, ridgeline, open plain |
| Foreground silhouette for scale | Pinpoint | 3200-6400 | ~20 s | f/2.8 or faster | 14-24 mm, 28-35 mm | Trees, ridgeline, buildings |
| Leading line to direct the eye | Pinpoint | 3200-6400 | 20-30 s | f/2.8 or faster | 14-24 mm | Boardwalks, roads, fences, seawalls |
| Tiny subject, sky as hero | Pinpoint | 3200-6400 | 15-20 s | f/2.8 or faster | 20-35 mm | Grassland, hills, lone trees, lighthouse areas |
| Reflection, north-sky circles, light trails | Trails | 800-1600 | 20-30 s x hundreds of frames | ~f/2.8 | 14-24 mm | Lake, coast, bridge, open view of north sky |
| Moonlit foreground | Moonlight | 800-1600 | 15-20 s | f/2.8-4 | 14-24 mm, 28-35 mm | Ridgeline, coast, buildings, scenes where foreground detail matters |
This table factors in not just sky exposure but how the ground should behave in each pattern. In star landscapes, focal length and standing position are compositional decisions as much as technical ones. When you want maximum sky, 14-24 mm is the core range; when the foreground shape needs a bit more weight, 28-35 mm steps in.
Baseline for Fixed-Tripod Pinpoint Stars
For freezing stars as points on a fixed tripod, the universal starting window is shutter speed 20-30 seconds, ISO 1600-6400, aperture f/2.8 or faster. Use that as a foundation and then nudge settings depending on whether you are prioritizing sky brightness or preserving a hint of ground form.
Stars move roughly 15 degrees per hour. The longer the shutter stays open, the more a pixel-level inspection reveals elongation. At wide-angle focal lengths, 20 seconds generally maintains a pinpoint feel across the frame, while approaching 30 seconds may introduce visible drift depending on the compass direction and field of view. Whether you optimize for overall impression or demand sharpness at 100% crop determines how strictly you enforce the limit.
For cleanly connected trails, the standard is comparative-brightening compositing: practically, 20-30-second frames numbering in the hundreds (e.g., 270 frames for roughly 90 minutes, 300 frames for roughly 100 minutes) at 1-second intervals. Total integration time controls trail length; frame count planning should also account for battery life, dew risk, and safe duration at the site.
Moonlit-Night Guidelines
A moon in the sky is not just a source of fewer stars — it is a natural fill light for the ground. When you want to show ridgeline texture, building surfaces, or the shimmer of the sea rather than dropping everything into silhouette, moonlight becomes an asset. A starting window of ISO 800-1600, 15-20 seconds, f/2.8-4 balances a visible foreground with enough sky character to keep the image feeling like a star landscape.
Set white balance manually, starting around 4000 K, to avoid the heavy blue cast that auto white balance often introduces under moonlight. Moon-lit nights render the ground brighter than the naked eye expects, so compositionally they favor frames that want visible foreground detail. Trees and buildings gain texture; coastlines and ridgelines show surface instead of pure outline.
Lens choice matters here too. 14-24 mm remains the versatile default for balancing sky and ground. When you want the foreground slightly more prominent, 28-35 mm is a viable option. Moonlight increases ground information, so a modestly narrower field of view can sustain a complete-feeling image.
A Practical Reminder
For long-exposure work, most cameras cap their built-in shutter speed at 30-60 seconds. Any trail expression that measures time in tens of minutes requires hardware support: a remote release or the camera's intervalometer. The mental shortcut on site is simple — pinpoint stars are one-shot, trails are continuous — and keeping that distinction clear prevents confusion when switching modes.
💡 Tip
Treat the table values as "first-frame settings" rather than final answers. My own on-site workflow is to pick the composition, classify it as pinpoint / trail / moonlit, then fine-tune from the corresponding baseline based on actual sky brightness and ground visibility. Starting from a reference point is always faster than reasoning from scratch in the dark.
Pre-Shoot Checklist: Moon Phase, Cloud Cover, Light Pollution, and Safety
Picking the Date and Location
Star landscape photography is won or lost before you press the shutter. You can refine composition on site, but the moon, cloud cover, darkness, and sightline clearance are largely fixed once you arrive. I often filter locations by asking "will this place be star-landscape-ready on this particular night" before I even consider what I want to shoot there.
For moon phase, the week surrounding the new moon is the easiest window to work with. The sky gets genuinely dark, and faint star density — especially in the Milky Way — comes through. That said, a moon in the sky is not automatically a disadvantage. When you want to show foreground shape naturally, moonlight serves as ambient illumination for the ground. If the composition calls for visible ridgeline texture or building surfaces, leaning into the moon rather than fighting it can be the stronger choice.
Weather forecasts deserve more than a glance at the "clear" icon. What you really want is cloud coverage data, specifically for high-altitude and mid-altitude layers. Ground-level clarity can look perfect while a thin veil overhead crushes star contrast. Mountain areas sometimes hold local clear patches thanks to terrain effects, so forecast numbers alone do not always tell the full story. I use the broad forecast to build a shortlist, then look at cloud-movement patterns to pick the side of the weather system most likely to open up.
For darkness estimates, a Light pollution map is invaluable. Checking the Bortle scale for an area tells you whether the Milky Way can headline or whether a city-glow-integrated composition is the realistic play. Ideal conditions mean dark sky, but you do not necessarily need a remote mountain — moving just a short distance into suburban outskirts often tightens the sky background noticeably. From a composition standpoint, heavy Light pollution weakens the sky's presence and forces you to lean harder on the foreground.
During desktop scouting, go beyond the map view and use satellite imagery and street-level panoramas. Check whether the horizon is open, whether city glow encroaches from the south or east, and whether trees or buildings offer foreground candidates. For a coastline, verify the horizon clearance; for mountains, study ridgeline layering; for a lake, assess which shore faces the right direction for reflections. I approach this step not as finding "a place to see stars" but as confirming which direction I can point the camera. Star landscapes depend less on raw location prestige and more on sightline geometry.
💡 Tip
Narrowing your scouting checklist speeds up decision-making. Moon phase, cloud cover, Light pollution level, and horizon clearance — when all four check out, you can focus entirely on composition once you arrive.
On-Site Preparation and Safety
At night, staying safe is as important as making images. A stumble in the dark or a gear failure costs more than any compositional misstep. The first things I want secured are reliable footing light and protection from cold and moisture.
A headlamp with a red-light mode beats a single bright white flashlight. Your hands stay free for tripod work and lens changes, and you avoid blasting nearby observers — or your own eyes — with white light that wrecks dark adaptation. Allow at least 10 minutes for dark adaptation before evaluating the sky; the number of stars you can see and the compositional information available in the sky both increase noticeably. Smartphones are surprisingly powerful light sources at night, so dim the screen and switch to a red-tinted display mode when possible.
Gear priorities are warmth, insect protection, and spare batteries. Beyond those basics, dew management has an outsized impact on yield. A fogged front element does not just cost one frame — it silently ruins every shot until you notice. On cold or waterside nights, a lens heater provides reliable prevention. Without one, frequent front-element checks are the minimum defense. Tripod stability matters too: on soil or gravel, legs can settle slowly, and spiked feet help. A drifting level means a drifting horizon, and in star landscapes that drift shows.
At drive-in sites, parking position and door management become part of the workflow. A single headlight beam pointed the wrong way can ruin a nearby photographer's long exposure. I make a point of killing lights calmly on arrival and unpacking gear methodically rather than all at once. At night, the most dangerous state is moving without seeing — or being seen.
Night-Shooting Etiquette and Access Permissions
Star landscape photography is a quiet pursuit, but the locations belong to everyone. Most problems arise not from technique but from arriving at a site without confirming whether you are allowed to be there after dark. Scenic spots often straddle private land, shrine grounds, parks, and observation decks — areas that may be open during the day but restricted at night.
Permissions deserve the first look. Fenced areas, parking-lot closure times, and posted night-access restrictions outrank any photographic appeal. Shrines and temples sometimes prohibit photography outside visiting hours; parks may gate off after sunset. A clear sky overhead does not equal permission to shoot. Star photography looks like a gentle hobby, but how practitioners treat their locations shapes public trust in the activity.
On the etiquette front, light management is the single biggest issue. Do not aim a white light at the sky or at another photographer's camera. Do not leave vehicle headlights pointing toward shooting positions. Keep voices low. These sound basic, but small lapses hit hard at night. In comparative-brightening compositing and long exposures, a few seconds of stray light leave a permanent trace. Framing it as "my one careless moment can erase someone else's 30-minute exposure" makes the stakes intuitive.
At popular viewpoints, avoiding another photographer's field of view is essential. When I arrive and see someone already set up, I first check which direction they are shooting. Whether they are running north-sky circles or waiting for a low Milky Way changes where I need to stay clear. At night locations, quiet, deliberate movement matters more than the size of your gear. Sorting out access and etiquette before you arrive frees mental bandwidth on site, and that bandwidth goes straight into better composition.
Choosing Among the Five Patterns and Next Steps
Recommended Compositions by Location Type
The five patterns are not ranked — they are matched to what a location naturally wants to show. Stable and reliable: rule of thirds. Clean foreground, big sky: silhouette. Depth and draw: leading line. Scale contrast: dot composition. Elevated artistry: reflection or trails.
At the ocean, a clean horizon hands you a strong line, making the rule of thirds the safest pick. The boundary between sea and sky is unambiguous, and the ratio almost sets itself. On calm nights or where tidal pools form, reflection compositions come alive as well. The mood shifts from "big Milky Way" toward quietness and expansiveness.
Where ridgelines define the landscape, foreground silhouette is the natural first choice. A mountain's contour line organizes the frame on its own, paring away clutter while delivering scale. The dark ridge absorbs ambient glow, so the pattern holds up even when some Light pollution is present.
Forest trails, boardwalks, fences, and stream-side paths call for a leading line. Night frames carry less information than daytime ones, so a single line creates disproportionate visual flow. At locations like these, I look first for a line that connects my feet to the sky. Even on nights when the stars themselves are not spectacular, the depth created by a strong line sustains the image.
At a lakeshore, calm water opens the door to reflection compositions. Near-symmetrical framing, when the conditions allow it, produces a density that sky alone cannot achieve. On nights when the surface is restless, pivot to shoreline trees or a dock as foreground elements and use the reflection as texture rather than a mirror — the composition still works, just in a different register.
In suburban or semi-rural areas where raw sky darkness is limited, silhouette compositions and trail compositions incorporating light streaks tend to be the most productive frameworks. Rather than fighting the Light pollution for a sky-dominant result, work with the ambient glow: drop buildings and trees into clean black shapes, or deliberately capture car-light trails along a road or bridge and fold them into the image as compositional energy.
Next-Action Checklist
The to-do list after reading this is short. The most important thing is to avoid trying all five patterns equally on a single outing. Pick one pattern as the lead for your location and let it anchor your standing position and exposure decisions.
Next, review the conditions for your shooting date. Star landscapes are not pure technique; moon phase and Light pollution shape the outcome as much as composition skill. Knowing in advance whether you have a genuinely dark sky or whether you should plan around moonlight and ambient glow makes every on-site decision faster.
Then jot down the wide-angle focal length you plan to start with and the initial exposure settings. Night amplifies small decision errors, so pre-noting your standing position, the compass direction you will face, and how you will set up the first frame lets you start shooting almost immediately on arrival. I find that reducing the number of choices I have to make in the dark directly improves my hit rate.
On location, resist locking onto your lead pattern exclusively — test-fire three patterns at most. At the coast, for example, commit to rule of thirds as the primary, then briefly try reflection and dot composition. In the mountains, lead with silhouette and sample rule of thirds and dot composition. Constraining options first and then branching slightly reveals the night's best answer faster than open-ended experimentation.
💡 Tip
When you are stuck on site, this shorthand helps: "Clean line visible? Rule of thirds or leading line. Strong shape? Silhouette. Still water? Reflection. Hero is small and sky is the point? Dot composition." That translation from scene to pattern is the single fastest way to cut through hesitation.
Going Further
Once composition feels reliable, the next frontier is expanding your finishing toolkit. If you want to connect star trails cleanly, comparative-brightening compositing is the natural progression — it introduces a time dimension that fixed-tripod shooting cannot reach. Trails are not just about shooting longer; how they interact with foreground shapes changes the personality of the image, making this an extension of composition knowledge rather than a separate skill.
For noise management, stacking software like Sequator offers effective reduction. Aligning and averaging multiple pinpoint-star frames smooths sky grain while leaving ground detail intact. Star landscapes are largely decided at capture, but learning to process unlocks the step from "a shot I got" to "an image I can show."
A further step is portable tracking mounts (portable equatorial mounts). Tracking lets you record tighter star points, which pays off when you want to reveal faint Milky Way structure or dense star fields at their best. Seeing a field of crisp, round stars fill the viewfinder never gets old. Solid composition fundamentals also protect you from the classic tracker pitfall of producing stunning sky halves glued to weak ground halves.
From here, the path leads to deeper exposure tuning, reading the conditions that favor Milky Way visibility, branching into time-lapse, and exploring tracked astrophotography. Composition is the entry point, but getting it right changes how you relate to the night sky more than any single piece of gear. On your next outing, go in with one pattern matched to your location, and aim for a single frame you do not have to second-guess.
Related Articles
How to Start Astrophotography: Camera Settings for Smartphones and DSLRs
How to Start Astrophotography: Camera Settings for Smartphones and DSLRs
Star photography might seem daunting at first, but with a fixed tripod setup — whether you're using a smartphone or a mirrorless camera — you can nail your first shot tonight. This practical guide is for beginners who aren't sure what settings to use, walking you through exact values for ISO, shutter speed, aperture, and focal length in the order you'll actually need them in the field.
When Can You See the Milky Way? Prioritizing Location, Moon Phase, and Season
When Can You See the Milky Way? Prioritizing Location, Moon Phase, and Season
If you want to spot that white band stretching across the summer sky, the first thing to check is not the season but how dark a location you can reach. The Milky Way is up there year-round, yet whether you can actually see it comes down to three factors in this order: how dark your site is, how little moonlight there is, and whether the dense core region happens to be above the horizon at that hour.
Is the Achi Village Night Tour Worth It? What Japan's No. 1 Stargazing Claim Really Means and How to Prepare
Is the Achi Village Night Tour Worth It? What Japan's No. 1 Stargazing Claim Really Means and How to Prepare
On a night when conditions align, the sky over Achi Village in Japan is genuinely breathtaking. That said, the 'No. 1 in Japan' label traces back to a 2006 Ministry of the Environment observation study, and what you actually see depends heavily on cloud cover, moonlight, and the season.
4 Best Portable Equatorial Mounts for Tracking Sharp, Pinpoint Stars
4 Best Portable Equatorial Mounts for Tracking Sharp, Pinpoint Stars
When you mount a camera on a tripod and shoot the night sky, Earth's rotation gradually turns stars into short streaks. A portable equatorial mount counters that motion, keeping stars as tight points of light. Whether you want clean wide-angle Milky Way shots or are ready to move beyond fixed-tripod photography, this guide walks you through how to choose and use these compact trackers.