
Winter Stargazing Clothing Guide | What to Wear Down to 14F (-10C)
Dry winter air brings exceptional sky transparency, and early sunsets mean you can start observing at a reasonable hour. The trade-off is brutal, though: stargazing keeps you nearly motionless for long stretches, so the same temperature that feels manageable on a brisk walk will cut right through you at the eyepiece.
This guide is for beginners who want to enjoy winter observing with binoculars or a telescope. It breaks down clothing by temperature bracket — 41F (5C), 32F (0C), 23F (-5C), and 14F (-10C) — so you can decide what to wear without second-guessing. Beyond layering, it covers hands, feet, headwear, red lights, chairs, insulating mats, warm drinks, hand warmers, power supplies, and dew prevention — everything that actually matters at the observing site.
ℹ️ Note
The temperature-specific layering and gear examples in this article draw on the author's own observing experience combined with well-established outdoor layering principles used in mountaineering and backcountry camping. Rigorous lab-tested data specific to stationary stargazing is limited, so treat these as practical guidelines. Adjust for your own cold tolerance and local conditions.
Why Winter Stargazing Is Both Rewarding and Punishing
Winter's reputation as prime observing season is not just a vague "cold air makes stars prettier" notion. When atmospheric moisture drops, light scatters less, and faint stars punch through to lower altitudes than they do on humid summer nights. On a good winter evening at a dark-sky site, the sky looks noticeably tighter all the way down to the horizon — you can feel the difference just tracing constellation lines. Add early sunsets to the equation and you gain hours of darkness without staying up past midnight.
The catch is that winter observing feels colder than the thermometer suggests. The reason is simple: your body generates almost no heat while you are standing beside a tripod or sitting in a chair staring upward. Walking to the site from the car feels fine, but after fifteen minutes of peering through an eyepiece, cold creeps up from your feet and settles into your lower back. I notice this at every star party I attend.
Three factors amplify the chill: wind, radiative cooling, and ground contact. Wind strips the thin layer of warm air trapped inside your clothing, dropping perceived temperature well below the actual reading. Radiative cooling pulls heat from your body and clothes into the open sky — clear nights accelerate this, and stargazers face upward into the worst of it. Ground contact is the one people underestimate most. Standing or sitting on frozen earth, concrete, or a wooden deck lets heat drain steadily through your soles and seat. Feeling cold in a camp chair despite wearing a thick jacket? That is ground chill doing the work.
ℹ️ Note
Winter clear-sky frequency varies by region. Pacific-facing coasts and continental interiors may enjoy long runs of clear nights, while other areas stay overcast for weeks. Your local climate shapes how much winter observing you can actually do.
Once you understand this, "just bundle up" stops sounding like enough. What you need is a system that blocks wind, traps the little heat your body produces, and insulates you from the ground. The layering approach — base, mid, and outer shells with distinct roles — works not just for temperature management but for handling wind and moisture at the same time. Stargazing hits your extremities first, so choosing gear with an eye toward where heat escapes fastest makes the whole process simpler.
One more thing worth noting: the best observing nights are often the harshest. Clear, calm, low-humidity evenings deliver superb transparency and steady Seeing, but those same conditions maximize radiative cooling. The nights when you think "the stars look incredible tonight" tend to be the ones where the ground temperature plummets after midnight. Winter's gift to astronomers and winter's punishment come from the same atmospheric setup.
Temperature-by-Temperature Winter Layering Guide
The Three-Layer Foundation Plus a Dry Base
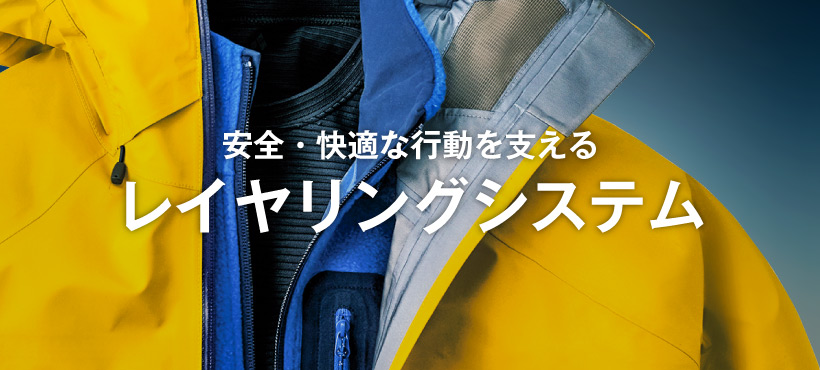
Building a winter observing outfit starts with base layer, mid layer, and outer layer — three shells with separate jobs. The concept is familiar from mountaineering layering systems: dividing roles keeps you warm without trapping sweat.
The base layer sits closest to your skin. Its job is to wick moisture away and keep your skin dry. If this layer gets damp, you will feel the cold the instant you stop moving. Stargazing is not a continuous-motion sport, so sweat from the walk to the site becomes a direct source of chill. Synthetic or merino wool bases work well here. Cotton is the material to avoid — it holds moisture, dries slowly, and saps heat once the breeze hits. A cotton T-shirt and hoodie feel fine in the parking lot but turn miserable twenty minutes into an observing session.
The mid layer creates a dead-air space for insulation. Fleece, wool, synthetic fill, and lightweight down all belong here. This is where you have the most temperature-tuning flexibility: add a layer when it drops, peel one off if you overheat during setup. Around freezing I rely on a heavyweight fleece; below that I stack a fleece with a lightweight down vest or jacket. Keeping your core warm makes a surprising difference to how fast your fingers and toes go numb.
The outer layer stops wind and holds warm air in. Windproof shells, softshells, and insulated jackets do this job. For stargazing, wind resistance matters more than waterproofing. Even at moderate temperatures, an open parking lot or hilltop with a steady breeze will hammer your perceived temperature. A regular city down coat works, but look for snug cuffs, a high collar, and a hem that seals — stationary observing punishes every gap.
Adding a fourth piece — a thin wicking liner worn beneath the base layer — takes sweat management further. This ultra-light layer pulls moisture off the skin and passes it to the base above. It earns its place on nights when you hike to the site or haul heavy gear. One thin layer, but the difference in "that sweat just went cold" moments is noticeable.
How you manage layers during transitions matters too. Not sweating during the walk in is sometimes more important than raw insulation, because sweat chill steals heat faster than cold air alone. Start a layer lighter while moving, then add your insulating or outer shell right before you settle into position. Overdressing during equipment setup and arriving at the eyepiece damp is a common beginner mistake. My own rule at winter star parties: feel slightly cool while walking, add a layer before standing still.
Lower-body layering follows the same logic. Legs get less attention than torsos, but they are just as exposed during long stationary sessions. The baseline is tights or a thin base under windproof shell pants or a heavy softshell. Once temperatures drop below freezing, slipping insulated down pants underneath makes a dramatic difference in comfort. Jeans alone let wind straight through and leave your knees aching within the hour — not a good stargazing choice.
For socks, merino wool is the practical standard. It insulates, it resists odor, and even when damp it retains warmth. Carrying one spare pair is a habit worth adopting. Your feet sweat more than you expect during a long session, and swapping socks midway through can reset your comfort level surprisingly well.
レイヤリングシステム(モンベル)
www.montbell.jp41F (5C): Short Sessions Near Town
41F does not sound extreme, but remember — you are standing still. Perceived temperature drops a full bracket below the reading when there is no muscle heat to offset it. At this range, everyday clothing plus a few stargazing-specific choices will keep you comfortable for half an hour to an hour in a suburban park or nearby dark-sky spot. The priority is avoiding overdressing and sweating rather than maximum insulation.
| Temp | Upper Body | Lower Body | Feet & Accessories | Transition Strategy |
|---|---|---|---|---|
| 41F (5C) | Wicking base, light fleece, windproof shell | Tights, heavy pants or softshell | Merino socks, beanie, thin gloves | Unzip or remove outer layer while walking; seal the windproof shell once you stop |
At this temperature, base + fleece + windbreaker handles most conditions. A full down jacket is often overkill and leads to sweating; a simple windproof layer on the outside does more work per ounce. Even when wind is calm downtown, a riverbank or open lot will feel noticeably sharper. A short binocular session scanning Orion at 41F with a breeze is enough to drive you indoors if the wind layer is missing.
For pants, a heavier pair alone is workable, but adding thin tights underneath provides a stability margin. If you tend to run cold, focus less on fabric thickness and more on whether the pants block wind — that single factor prevents more discomfort than an extra layer of cotton.
32F (0C): One to Two Hours at a Suburban Dark Site
At freezing, casual clothing stops being enough. If you plan to stand in a field for an hour or two, build your kit assuming you need one step up in insulation for both upper and lower body. Setup and teardown involve short bursts of activity, but the observing itself is pure stillness — sweat management and warmth have to work together from here on.
| Temp | Upper Body | Lower Body | Feet & Accessories | Transition Strategy |
|---|---|---|---|---|
| 32F (0C) | Wicking liner, base, heavyweight fleece, shell or down jacket | Fleece-lined tights, softshell pants | Merino socks, spare pair, insulated hat, insulated gloves | Shed one mid layer in the car; add fleece or down after arriving on site |
This is where four layers start to pay off. Keep the skin dry, insulate in the middle, block wind on the outside. At 32F your shoulders and lower back stiffen quickly once you stop moving. A city down jacket helps, but building a removable mid layer underneath makes it far easier to adjust — unzip the down, or strip the fleece, without losing the wind barrier.
Lower body: tights plus windproof pants is the baseline. Chinos or jeans alone will leave your thighs aching after an hour. If you sit to observe, the backs of your knees and your seat cool rapidly — tights make a measurable difference.
Gloves do not need to be extreme yet, but a single thin pair will leave your fingertips cold within half an hour. Thin liner gloves under insulated gloves let you pop the outer layer off for focus adjustments and phone checks, then slide them back on without going bare-handed.
23F (-5C): Stationary for an Hour-Plus
At 23F, cold surprises you from below. Even if you brace for it mentally, legs and extremities take the hit harder than expected. Standing still and looking up for an hour drains core heat in a way that no amount of upper-body layering fully compensates. From here on, windproofing and foot protection matter as much as how many layers you wear on top.
| Temp | Upper Body | Lower Body | Feet & Accessories | Transition Strategy |
|---|---|---|---|---|
| 23F (-5C) | Wicking liner, heavy base, fleece, lightweight down, windproof shell | Heavy tights, softshell or wind shell, insulated down pants if needed | Heavy merino socks, spare pair, ear-covering hat, liner gloves + insulated gloves | Keep shell open or delay adding down while moving; complete insulation layer once at observing position |
Upper body now needs two insulating layers. Fleece alone is not enough once you stop, and down alone traps sweat during setup. Splitting them — fleece for moisture tolerance, down for warmth — keeps things manageable. Winter stargazing does not let you "walk it off," so aim for gear that feels right ten minutes after you stop, not the moment you arrive.
Lower body: build around a windproof shell or heavy softshell as the main piece, with tights and insulated pants layered inside. In my experience, legs and toes surrender before the torso at this temperature. Even on calm nights, feet stay close to frozen ground and keep losing heat. Insulated down pants transform stationary comfort at this range.
Gloves need an upgrade too. Thickness helps, but kills dexterity. Liner gloves plus an outer mitt strike the best balance — keep the mitt on by default, strip it for short tasks, put it back before your fingers go numb.
💡 Tip
Below 23F (-5C), sealing gaps at the neck, wrists, and ankles does more than adding another layer. Warm air escapes through openings faster than through fabric. A neck gaiter and cuff-cinching outer shell pay dividends here.
14F (-10C): Extended Sessions and Mountain Sites
14F is where toes cross from "cold" into genuine pain if you get the footwear wrong. Mountain and plateau sites offer spectacular skies at these temperatures, but your clothing system needs to be a deliberate cold-weather build, not an extension of what you wear around town.
| Temp | Upper Body | Lower Body | Feet & Accessories | Transition Strategy |
|---|---|---|---|---|
| 14F (-10C) | Wicking liner, heavy base, heavy fleece, lightweight down, insulated or windproof outer | Heavy tights, wind shell or heavy softshell, insulated down pants | Heavy merino socks, spare pair, insulated boots, ear-flap hat, liner gloves + mittens | Delay insulated outer during the walk; complete outer layer at observing position. If setup work makes you sweat, open one layer briefly |
Upper body: two mid layers plus a serious outer shell is the baseline. Fleece and down together, sealed by a windproof outer with a hood. On the clearest, coldest nights radiative cooling is fierce — shoulders and upper back stiffen just from reading a star chart. Choose an outer with genuine wind resistance and a usable hood; a hood layered over a beanie creates a double air pocket around your head.
Lower body can no longer get by on "fairly thick pants." Heavy tights + windproof pants + insulated down pants is the realistic combination. Sitting observers lose heat through the seat and back of the thighs even faster than those standing, so bottom-half insulation deserves as much thought as the top half.
For hands, mittens beat five-finger gloves for raw warmth at this temperature. Dexterity suffers, but at 14F keeping fingers from going numb matters more than fine motor control. A liner glove underneath lets you drop the mitt for brief star-chart checks or equipment adjustments without full bare-hand exposure.
Footwear comes down to heavy merino socks and insulated boots. Spare socks earn their weight here — even slight dampness accelerates cooling dramatically. In deep-winter observing, the torso holds up long after the feet have given out. At 14F, the three things that matter most are keeping sweat off your skin, sealing every wind entry point, and not cramming feet so tightly into boots that the insulating air space collapses.
Hands, Feet, and Head: Where Comfort Is Won or Lost
Gloves: Thin Liners, Insulated Gloves, and the Liner-Plus-Mitt System
If I had to rank extremity priorities, feet come first, fingers second. But fingers demand the most compromise because you actually need to use them — adjusting focus, handling Eyepiece caps, checking star charts, tapping a phone screen. Balancing warmth and dexterity is the central problem, and it is harder to solve than torso insulation.
Three approaches, each with a clear trade-off. Thin gloves alone give you full dexterity and work fine for short sessions. Insulated gloves keep hands warm but make small dials and lens caps maddening. The sweet spot for most winter observers is a thin liner glove paired with an insulated mitt. Default to the mitt for heat retention, strip the outer layer for the few seconds you need fine control, then re-cover. This minimizes bare-skin exposure time.
In practice, heavy gloves alone create a "warm but useless" problem, while thin gloves alone create a "functional but freezing" one. The two-layer approach avoids both extremes. Whether your session is binocular-based or involves camera work, the system holds up. Touchscreen compatibility works best at the liner level — most mitts are too thick for reliable screen input anyway.
| System | Warmth | Dexterity | Touchscreen | Best For |
|---|---|---|---|---|
| Thin gloves only | Low | High | Works with compatible models | 41F (5C), short sessions, binocular-focused |
| Insulated gloves only | High | Low | Difficult even with compatible models | Stationary observing with minimal gear handling |
| Liner gloves + insulated mitt | High | Medium–High | Works via liner | Below-freezing observing, best warmth-dexterity balance |
Mountaineering gloves can serve as a reference point for extreme-cold stargazing. Models like the Black Diamond Soloist Finger, which Ichiro Photography rates for roughly -24F to +16F (-31C to -9C), offer enormous thermal headroom. That thickness costs dexterity, though, so treating them as a warming shell rather than an all-purpose glove fits the observing workflow better. For fine tasks, the peel-the-outer-keep-the-liner method remains the most practical approach.
Feet: Boots, Socks, Insoles, and Insulating Mats
Feet are the highest-priority extremity. The reason is straightforward: feet lose heat to the ground. Your torso may be well-layered, but feet in direct contact with frozen earth bleed warmth continuously. Stargazing keeps you planted in one spot with almost no walking to generate heat, so the drain adds up faster than you expect.
Winter boots or insulated rubber boots form the foundation. Pair them with heavy merino socks and add an insulating insole to slow the upward creep of ground chill. The critical point is not to overdo sock thickness until the boot interior becomes tight — squeezing out the air space between sock and boot wall actually makes feet colder. In deep-winter sessions I find that boot insulation matters less than whether there is room inside for a proper air buffer.
Breaking up continuous ground contact helps too. Insulating mats are not just for sleeping bags. In winter stargazing, think of them as a barrier between you and the cold surface. R-value indicates insulating performance; higher is better, and R5 or above is a practical winter target. Even a small sit pad, placed under a chair or beneath your feet, cuts the conduction path noticeably. If you spend long stretches standing in one spot — common in astrophotography — laying a closed-cell foam pad underfoot is a legitimate and effective strategy.
Foot cold correlates more with ground contact than with air temperature. Asphalt parking lots, frosted grass, frozen dirt — all of these drain heat from below faster than they cool your upper body. When heavy merino socks alone are not enough, the issue is usually not sock thickness but an unbroken thermal path to the ground. On the coldest nights, adding ground insulation under your feet does more than adding another jacket on top.
💡 Tip
Think of foot warmth as a three-part system: boot insulation, sock insulation, and ground barrier. When toes go numb, address the ground layer first — it is often the missing piece.
Head and Neck: Beanies and Neck Gaiters
Head and neck do not scream for attention the way frozen fingers do, but protecting them changes whole-body comfort dramatically. Stargazing posture keeps your face angled upward, opening gaps around the collar — sealing head and neck heat loss stabilizes your overall perceived temperature.
An ear-covering beanie is the simplest effective choice. A jacket hood alone works in some conditions, but hoods are imprecise — they block wind but do not press close enough to prevent ear and temple chilling. A beanie underneath a hood creates a double air layer and stays put when you turn your head. At star parties I regularly see newcomers go from "I'm freezing" to "this is manageable" just by pulling on a proper hat before touching their glove situation.
For the neck, a neck gaiter beats a scarf for observing. The closed loop eliminates gaps, stays put when you look up, and does not interfere with binoculars or Eyepiece use. Below freezing, a cold draft hitting the front of your neck alone can make your entire body feel colder. Combining an ear-covering beanie with a neck gaiter stabilizes core insulation, and as a result, hands and feet cool more slowly too.
Head and neck protection is not dramatic gear, but for stationary stargazing its impact is outsized. Cut ground chill at the feet, preserve dexterity at the fingers, reduce heat loss at the head and neck — those three pillars together shift the comfort equation at any given temperature.
Gear That Makes a Difference Below 14F (-10C): Chairs, Lights, Hand Warmers, Drinks, and Power
Red Lights: Protecting Your Dark Adaptation
One of the quieter upgrades that pays off all winter is defaulting to red light. Dark adaptation — the process that lets your eyes pick up faint objects — collapses after a single exposure to a white LED or phone screen, and rebuilding it feels painfully slow. A nebula's faint glow that was visible a moment ago simply vanishes. Even with binoculars on Orion, the difference between adapted and unadapted eyes is stark.
A headlamp with a red mode is the most practical form factor. It frees both hands for Eyepiece caps, charts, and glove changes. Not all red modes are equal, though. Look for a lamp that powers on directly in red or lets you lock it there without cycling through white first. A lamp that always starts in white mode is a hazard to your own adaptation and to anyone observing nearby.
Brightness should be low. For checking gear or swapping an Eyepiece, you want a dim wash at close range, not a floodlight. When talking to someone, tilt the lamp down toward your chest so the beam does not hit their eyes. For chart reading, sometimes bouncing light off your gloves or knees produces a softer, more usable glow than aiming directly at the paper.
Minimize phone screen time too. As a general guideline, about ten minutes without looking at a bright display is enough for your eyes to settle into reasonable dark adaptation. Red light is not flashy gear, but on a transparent winter night when you are chasing faint targets, it is the difference between seeing them and not.
Chairs and Insulating Mats: Maintaining Core Temperature While Stationary
Below freezing, being able to sit extends your observing session significantly. The problem is that sitting opens two new heat-loss paths: through the seat and through the soles. The solution is pairing a chair with insulating mat material to break both paths.
For binocular observing, a low-back chair lets you lean and scan the sky comfortably; for telescope or camera work with frequent standing, a folding stool is more practical. Low chairs put you closer to the ground and its chill, so placing insulation on the seat surface and under your feet makes a noticeable difference.
Think of insulating mats as "thermal breaks" rather than sleeping gear. R-value measures insulating ability; R5 or higher is a solid winter benchmark, and stacking thin mats adds R-values together. I have had sessions where swapping in a mat under the chair helped more than adding another jacket. When layering clothes is not enough, the remaining heat leak is usually through the seat and soles.
A foot mat is useful for astrophotography too, where you stand in one spot for extended periods. Frozen asphalt or soil will drain heat through even well-insulated boots. A small piece of closed-cell foam underfoot slows the loss. Chair, seat pad, foot pad — addressing all three as a set is a separate axis of cold protection from clothing, and it works.
💡 Tip
Below freezing, your seat and soles can betray you before your hands do. Adding an insulating mat often delivers a bigger comfort jump than upgrading your chair.
Hand Warmers and Hot Drinks: Use Them Before You Need Them
Both hand warmers and warm beverages work better as prevention than rescue. At 14F (-10C), once deep chill sets in, it takes a long time to claw back to comfortable. Starting warmth support early in the session keeps you going longer.
A thermos of something warm is the simplest performance booster. A few sips during a short break ease stiff hands and sharpen flagging concentration. Cold, clear winter skies tempt you into marathon sessions, but punctuating them with brief warm-up pauses actually extends total observing time. I always bring one thermos of something sweet on winter expeditions — the difference in end-of-night fatigue is real.
Hand warmer placement changes effectiveness. For observing, the goal is not to roast one spot but to support blood flow and core warmth. Useful positions include the back of the hand or inner wrist for hand warmth, and the lower back near the kidneys for core support. For feet, toe-specific warmers designed for shoes fit better and interfere less with walking than forcing a standard warmer into a boot.
One caveat: in genuinely cold conditions, chemical hand warmers can be slow to reach full output or underwhelming in heat. Keeping them in a pocket until you are ready to use them helps — exposure to open air cools them down. Rather than stacking multiple warmers on one spot, distribute them across wrists, lower back, and toes for more balanced warmth that does not distort your posture.
Power: Mobile Batteries, Small Portable Stations, and High-Capacity Units
Winter observing power needs go beyond charging a phone. Factor in red lights, cameras, dew-prevention heaters, and the required capacity and form factor shift. A useful framework is three tiers: mobile battery, small portable power station, and high-capacity power station.
Mobile batteries handle phones and USB-powered accessories. They are light and easy to toss in a bag, and a 20,000 mAh unit provides roughly 74 Wh at 3.7V — comfortably under the 100 Wh airline carry-on threshold. For observers who fly to dark-sky destinations, that combination of portability and limited scope is a good fit.
A small portable power station adds meaningful versatility. The Jackery 300 Plus, for example, weighs about 8.3 lbs (3.75 kg) at 288 Wh (~$300 USD) and is rated for operating temperatures of 14F to 113F (-10C to 45C). This class handles camera charging, USB devices, and dew-prevention heaters — low-to-moderate continuous loads that make winter astrophotography practical. A lens or tube heater running all night is a realistic ask; an electric blanket or ceramic heater is not. Keeping expectations matched to output keeps the setup reliable.
For overnight astrophotography or multi-device setups, high-capacity models enter the picture. The Jackery 1000 Plus offers 2042 Wh and shares the same 14F to 113F (-10C to 45C) operating range. The capacity headroom is generous, but watch the charging temperature: Jackery's cold-weather guidance specifies 32F to 113F (0C to 45C) for charging. You can discharge in the cold, but topping off on-site below freezing may not work. Plan around a full charge before departure and insulated storage rather than field recharging.
When choosing a power source, think in terms of what you are running and for how long rather than raw capacity alone. Phone and red-light insurance: mobile battery. Camera and dew heater: small portable station. All-night imaging with multiple devices: high-capacity unit. In winter, how you handle low-temperature behavior matters as much as the watt-hour number on the label.
Cold-Weather Trouble Spots: Battery Drain, Condensation, and Phone Use
Battery Behavior in the Cold: Insulation, Spares, and Power Sequencing
A common winter surprise is batteries that "die suddenly" — but what actually happens is that low temperatures increase internal resistance, reducing usable voltage even though charge remains. According to Battery University (https://batteryuniversity.com), lithium-ion cells at -4F (-20C) can lose anywhere from roughly 10% to nearly 50% of their accessible capacity compared to room temperature, depending on the cell chemistry. That "half-full battery that just quit" makes perfect sense once you understand cold-voltage sag.
At below-freezing sites, I consistently find that the device in the most exposed pocket fails first. It is not about remaining charge — it is about which unit got coldest. So the operational priority is keeping batteries warm, not just conserving power. Spare batteries and power banks belong in an inner pocket close to your body, not in an outer pack compartment. The colder a spare gets before you need it, the less it will deliver.
Power sequencing matters in the cold too. Rather than running a long cable to a device that has been sitting in the frost, swap in a body-warmed spare battery first, then connect external power only to what needs it. Starting USB heaters, phone charging, and camera power all at once drains a portable station faster than expected. Prioritize the device whose failure would end the session, keep phone top-ups short, and the overall system lasts longer.
Phones are especially cold-sensitive, so park yours in an inner pocket during standby rather than an outer shell pocket. When you do pull it out, work quickly with liner gloves and put it back before fingers or battery suffer. Deciding what you need to check before you take the phone out — rather than browsing aimlessly in the cold — saves both hand warmth and battery life.
Charging Temperature Limits and Field Handling
The complication that trips people up is that operating temperature and charging temperature are separate specs. The Jackery 1000 Plus, for instance, operates down to 14F (-10C) but charges only above 32F (0C). The Jackery 300 Plus similarly operates at 14F to 113F (-10C to 45C). A device running happily at 20F does not necessarily accept a charge at that temperature.
The typical field mistake is plugging in a cold-soaked power station "because the meter is low." At low temperatures the charging circuit may refuse the input or deliver it erratically. A more reliable workflow: depart with a full charge, manage consumption on-site, and save recharging for a warm environment. Swapping in pre-warmed spare batteries beats field recharging in almost every winter scenario.
When warming cold batteries after a session, avoid rapid heat — do not aim the car's dashboard vent directly at a frozen power bank. Gradual warming inside clothing or at room temperature is safer and avoids thermal shock. The same applies after you get home: let gear reach room temperature before plugging in a charger. That small delay prevents most winter charging problems.
💡 Tip
In winter, shift from "charge the lowest device first" to "keep the most critical spare warm." A pre-warmed battery delivers immediate power; a charger in the cold may not.
Dew Point and Condensation: The Basics
Condensation is not just "it is cold outside." It forms when a surface drops below the dew point of the surrounding air. Understanding this explains why optics fog. At 68F (20C) with 60% relative humidity the dew point is roughly 54F (12C); at 70% humidity it rises to about 58F (14.4C). Even when the air itself is 68F, any surface that reaches those lower temperatures will collect water.
During stargazing, optics face the open sky for hours and lose heat through radiative cooling, so lens and tube surfaces drop below ambient temperature. Front elements, Finder scope optics, and Eyepiece surfaces are the first to fog because they radiate heat most efficiently. Winter feels dry, but near coastlines, lakeshores, wetlands, or snow cover, there is enough atmospheric moisture for dew point conditions to be met on nights with strong radiative cooling.
In practical terms: "humid air causes fog" is less accurate than "a surface cold enough to cross the dew point causes fog." That reframing points toward the right fix: instead of just carrying a lens cloth, keep the surface temperature above the dew point. Preventing the drop is more efficient than wiping after it happens.
This dew-point logic also applies at teardown. Moving ice-cold gear into a warm, humid car interior creates a new temperature differential — now the indoor air deposits moisture on the cold surfaces. Preventing fog during the session and preventing fog during pack-up are two faces of the same physics.
Dew Prevention for Optics: Heaters and Lens Hoods
The standard defense is a lens hood to reduce the sky-facing surface area, combined with a dew-prevention heater to keep surface temperature above the dew point. A hood alone slows radiative cooling — the front element "sees" less sky — but on humid nights it may not be enough. Adding a heater closes the gap.
The goal of a heater is not to make the surface hot; it is to hold it just above the dew point. Overheating wastes power and can create localized air turbulence that degrades the image. A gentle warmth is all you need. In practice, targeting the most fog-prone area — typically the front element or corrector plate — is more efficient than trying to heat an entire optical tube. For binoculars, extending the objective-side hood or insulating the Eyepiece area shifts the dew onset significantly.
Repeatedly wiping fogged optics mid-session interrupts observing and risks leaving smear marks. Running a low-level heater from the start of the session eliminates most "suddenly everything is white" surprises. For long tracking sessions in particular, condensation tends to cascade once it starts — continuous low-power prevention beats reactive wiping.
Teardown deserves care too. Resist the urge to seal cold gear into cases immediately. Let surfaces dry in open air first, or transition through a space with a smaller temperature differential before closing cases. Returning optics gradually to room temperature and allowing moisture to evaporate before storage is an understated but practical habit that prevents post-session fog damage.
Day-of Checklist for Winter Stargazing Beginners
Trying to think about clothing and equipment simultaneously leads to forgotten items. Locking in a sequence by time of day keeps things consistent. I use roughly this order when coaching beginners at star parties. In winter, "I'll deal with the cold when I get there" is a losing strategy — the ten minutes before you leave the house matter most.
- Ten minutes before departure: check sky conditions and lock in clothing, then pack priority gear first
Go beyond a rain check. Line up weather, forecast low temperature, wind speed, moon phase, and moonrise/moonset so you know whether the night will be "cold" or "bright and hard to observe." Winter clear skies with wind drop perceived temperature fast, and a high moon washes out faint objects and meteors. Match your clothing to the temperature tables above and settle on it now. When in doubt, choose a system that is easy to add to on-site. Load gloves, boots, red light, and hand warmers into the bag first — in practice, weak extremities end sessions faster than a missing mid-layer jacket. Also pack spare socks, spare liners, and spare batteries at this stage so you are not digging through the car later.
- On arrival: finish layering in the car before stepping outside
Do not jump straight out. Add your final insulation layers inside the car — hat, neck gaiter, outer shell, heavy gloves or mittens. Trying to adjust once the cold hits wastes body heat immediately. Once outside, switch your headlamp to red mode and commit to the ten-minute dark-adaptation window without staring at phone screens. Beginners tend to keep a planetarium app open the whole time, but on a dark-sky night those ten minutes transform what you can see. When I started out, I was impatient too — but sitting in the dark and just watching, the star count visibly climbs as your eyes settle.
- During observing: make small corrections before the cold bites deep
Endurance stargazing is not about toughing it out. Short resets every 30 to 45 minutes — a sip of something warm, a few squats, some toe-wiggling — prevent deep-core chill from accumulating. Standing motionless at the eyepiece drains heat faster than you realize. Hands and feet are hard to recover once they are truly cold, so add warmers before you feel the chill rather than after. Keep liner gloves on for dexterity during active observing; switch to the heavy layer during rest breaks. On nights with strong moonlight, shifting targets to bright clusters and easy showpieces like the Orion Nebula keeps satisfaction high relative to the cold investment.
- Teardown: dry before packing, and handle power with temperature in mind
Start by wiping condensation from optical surfaces rather than stuffing gear into bags. Binoculars, Finder scopes, and Eyepiece assemblies hold moisture — dry them before closing cases. At home, let smaller optics air-dry rather than sealing them in cases immediately. Check remaining charge on batteries and power stations during teardown so you know what to top off at home. Many units that operate below freezing have a higher minimum temperature for charging — the Jackery 1000 Plus, for example, runs down to 14F (-10C) but charges only above 32F (0C). Do not plug in a frozen unit; note the level, let the gear warm up naturally, and charge once it is back to room temperature.
💡 Tip
The winter observing mantra: "layer before arrival, drink before thirst, wipe before fog." Fixing a sequence beats improvising in the dark. Repeatability matters more than perfection.
Summary: Priority Gear to Buy First
To avoid over-buying, start with extremity and accessory gear rather than expensive core layers. The highest-impact first purchases are: liner gloves + mittens, a red headlamp, an insulating mat, spare merino socks, hand warmers, a thermos for a hot drink, and a spare battery pack. For backyard or short suburban sessions, this starter kit dramatically improves comfort. As you move toward longer outings and remote sites, add insulated winter boots, insulated down pants, a dew-prevention heater, and a portable power station as the next tier.
- Top priority: liner gloves + mittens, red headlamp, insulating mat, spare socks, hand warmers, hot drink thermos, spare battery
- Next tier: insulated winter boots, insulated down pants
- For remote expeditions: dew-prevention heater, portable power station
Your next step is straightforward: check the forecast low and wind speed, match your layering to the temperature table, prepare hands-feet-head gear first, then decide whether you need power and dew protection — that sequence gets you from the front door to the eyepiece without unnecessary gear or gaps.
Related Articles
Geminid Meteor Shower 2025: Peak Times, Cold-Weather Gear, and What to Expect
Geminid Meteor Shower 2025: Peak Times, Cold-Weather Gear, and What to Expect
The 2025 Geminids peak around 5 PM JST on December 14, but the practical viewing windows are the nights of December 13–14 and December 14–15. After 9 PM the radiant climbs high enough to see well, and by around 2 AM it's near the zenith — making this one of the most accessible showers for first-timers despite the December cold.
How to Start Stargazing: 5 Steps You Can Do Tonight
How to Start Stargazing: 5 Steps You Can Do Tonight
You don't need a telescope to start stargazing. Begin with bright, easy targets like the Moon and Venus, then gradually add binoculars and — if you want — a telescope. Starting with naked-eye objects and building from there is the approach least likely to leave you discouraged.
How to Find Nebulae and Star Clusters | Deep Sky Beginner's Guide
How to Find Nebulae and Star Clusters | Deep Sky Beginner's Guide
Nebulae are clouds of gas and dust, star clusters are groups of stars, and galaxies are massive island universes of stars and gas. Even though the names sound similar, what you see and how you find them differ enough that sorting this out first makes the night sky much more readable.
Stargazing Gear Checklist | 7 Essentials Beginners Always Forget
Stargazing Gear Checklist | 7 Essentials Beginners Always Forget
When it comes to stargazing gear, there are things you should sort out before you even think about a telescope. For your first night under the sky, three things come first: a red light, warmth and insect protection, and a way to find stars. Here are the 7 essentials that beginners consistently overlook.