How to Find and Observe the Andromeda Galaxy M31 with Binoculars
The Andromeda Galaxy M31 is a signature autumn target that beginners can realistically spot with binoculars under the right conditions. It is not an impossibly difficult object, but you will not see the swirling arms and vivid colors of photographs -- in practice, the challenge is picking out a faint, elongated glow. Based on my own experience, I rate it around intermediate difficulty (roughly Level 3).
This guide covers how to choose a dark-sky site away from 光害 during the new-moon window from autumn through early winter, along with a reliable star-hopping route from the Great Square of Pegasus through Alpheratz to Mirach. You will find practical comparisons of 7x50, 8x42, and 10x50 binoculars, plus tips for spotting the companion galaxies M32 and M110 -- everything you need to succeed on your first attempt, laid out in order.
Can You Actually See the Andromeda Galaxy M31 with Binoculars?
The short answer is yes -- M31 is well within binocular range. That said, do not expect the dramatic spiral structure and rich color you see in astrophotographs. What you actually observe is more subtle: to the unaided eye under dark skies, M31 appears as a faint smudge; through binoculars, it resolves into an elongated, softly glowing ellipse. I consider this an intermediate-level target (roughly Level 3) based on many nights out, though your results will depend heavily on conditions.
The most common misconception goes something like this: "If M31 is so large, wouldn't a telescope show it better?" In reality, M31 spans roughly 4 degrees across the sky -- equivalent to about five full moons side by side. Point a high-magnification telescope at it and the field of view clips the outer reaches. The bright core dominates, while the faint outer halo disappears. At public observing sessions, I almost always hand someone binoculars before the telescope. The overall impression of the galaxy comes through far more naturally at low power.
What works for this target is low magnification and a wide field of view. Binoculars like 7x50 or 8x42, with their generous fields and strong light-gathering ability, make the elongated glow much easier to trace. A 10x50 pair can still do the job, but the narrower field sacrifices some of the sense of sheer scale that 7x or 8x magnification delivers. M31's integrated 等級 looks bright on paper, yet because that light is spread across a huge area, the actual surface brightness is low -- and that is the defining characteristic of this galaxy.
The factors that determine success are clear-cut. A moonless night, a dark location, clear skies, thorough dark adaptation, and steady hands -- when all five come together, your chances jump noticeably. 光害 and moonlight have the largest impact; even a moderately bright sky erases the faint outer extensions. On the other hand, if you give your eyes 20 to 30 minutes to adapt on a crisp night, you may suddenly notice an elliptical glow that was invisible moments earlier. Handheld viewing works, but even bracing your elbows changes the impression. With M31, satisfaction depends less on whether you can detect it at all and more on how much structure you can tease out when the conditions are right.
Andromeda Galaxy M31 -- The Essentials
Names and Catalog Numbers
The Andromeda Galaxy is formally designated M31 / NGC 224. M31 is its Messier catalog number; NGC 224 is the New General Catalogue entry. Both refer to the same object, located in the constellation Andromeda and classified as a spiral galaxy -- the same type as our own Milky Way.
Newcomers often assume they are looking at a type of nebula. What you are actually seeing through your binoculars is an entire galaxy -- a vast island of stars, gas, and dust. When I explain this at observing events, people often look back through the eyepiece with fresh eyes. That faint glow suddenly feels like something extraordinary. It is a target you locate by tracing a constellation pattern, yet its true nature is an immense structure far beyond the boundaries of our own galaxy.
For reference, both the Astronomical Dictionary of Japan entries on "M31" and "Andromeda Galaxy" treat M31 and NGC 224 as the same object in the Andromeda constellation. Throughout this article, distances and dimensions are stated as approximate values to avoid minor discrepancies between sources.
M31
アンドロメダ銀河のこと。メシエカタログの31番目の天体。NGCカタログではNGC 224。銀河であることがわかるまではアンドロメダ星雲と呼ばれていた(大論争を参照)。局所銀河群に属する渦巻銀河で、天の川銀河(銀河系)と並ぶ局所銀河群で最大の
astro-dic.jpDistance, Size, and Brightness
M31 lies roughly 2.5 million light-years away -- about 770 kpc in astronomer's units. When you point your binoculars at it on an autumn evening and see only a faint smear, consider that the photons reaching your retina have been traveling for close to 2.5 million years. That thought alone reshapes the scale of what you are doing.
The apparent size is equally striking: M31 stretches roughly 4 degrees across the sky, or about five full moons end to end. This is why photographs rarely convey just how big it really is. Through wide-field binoculars, you can trace the elongated ellipse spreading out from the core. The moment you look, it becomes obvious that this is not a point source -- it is a surface, spread across the field.
Where beginners get tripped up is the 等級 figure. M31 clocks in at roughly magnitude 3 to 4, which sounds bright. The catch is that total brightness and perceived brightness are not the same thing. All that light is smeared across a large area, so the surface brightness -- the brightness per unit area -- is low everywhere except the core. The first time I observed it, I expected something punchy at magnitude 4. What I got was a subtle, elongated glow that I had to coax out of the sky. M31 is the kind of target where the magnitude number alone will set you up for disappointment.
The Allure of the Most Distant Naked-Eye Object
One reason the Andromeda Galaxy holds a special place is that it is one of the most distant objects visible to the unaided eye. Under truly dark skies, you can detect it as a faint luminous patch without any optical aid at all. The fact that you are seeing something 2.5 million light-years away with nothing but your own eyes is a genuinely startling realization, even for experienced observers.
The appeal goes beyond raw distance. Nebulae and star clusters feel relatively close and familiar. M31, on the other hand, stretches the scale of what your eyes can reach in a single leap. The first time I confirmed it with the naked eye from a dark rural site, the view itself was understated -- but the moment I consciously recognized that I was looking at a galaxy outside the Milky Way, the autumn sky suddenly felt immeasurably deeper.
No vivid colors, no visible spiral arms -- yet M31 has remained one of the most popular targets for generations. The reason is simple: whether through binoculars or the naked eye, you are experiencing another galaxy firsthand. Among all the deep-sky objects a beginner might encounter for the first time, that makes M31 something apart.
When and Where to Look: Season, Timing, and Moon Conditions
Best Season and Time of Night
The prime window for observing M31 with binoculars runs from autumn through early winter. During these months, M31 climbs high enough in the sky that haze and 光害 near the horizon become less of a problem. From my experience guiding observers on-site, late summer puts M31 too low for a satisfying view, and by deep winter the best hours shift earlier in the evening. For a first attempt, autumn gives you the most forgiving conditions.
The sweet spot falls between dusk and midnight, with the best views coming when M31 has gained sufficient altitude. Although M31's total brightness ranks it among the brighter deep-sky objects, its light is spread thin across that huge apparent size. Down near the horizon, its presence drops off sharply. Simply timing your session for when M31 is higher can make a noticeable difference through the same pair of binoculars.
Ideal conditions are clear skies, no moonlight, and no nearby artificial light. The Gunma Astronomical Observatory's guide to M31 (a well-known public observatory in Japan) emphasizes exactly the same factors. In my own experience, even a completely cloudless night can disappoint if the sky has a whitish cast -- the faint outer extensions get swallowed. On a transparent autumn night, though, the glow extending from the core becomes much easier to trace.
How Moon and Transparency Affect the View
Despite its relatively bright 等級 rating, M31 is extremely sensitive to sky darkness and atmospheric transparency. The reason is straightforward: unlike a star that concentrates its light into a point, M31 spreads a faint glow over a wide area. The core may remain visible under mediocre skies, but the outer extensions -- where much of the visual appeal lies -- fade the moment the background brightens even slightly.
The ideal setup is a clear, transparent night with no moonlight and minimal artificial light nearby. Even the moon alone raises the sky background enough to shrink M31's visible extent. Observing from the same suburban site on different nights, I have repeatedly seen the "elongated stretch" come through clearly on moonless evenings, only to contract to "a vague bright patch around the core" when the moon is near first quarter.
City centers are tough. On the Bortle Dark-Sky Scale, sites rated Bortle 6 or higher make it difficult to appreciate M31's full extent through binoculars. At Class 7 through 9 -- residential areas to urban cores -- you are fighting to detect anything beyond the nucleus. At Class 5 to 6, the outer halo remains elusive, and you are essentially trying to decide whether you can see a faint smear at all. Drop to Class 4 or 5, and M31 begins to register as the large elliptical glow it truly is.
💡 Tip
M31 may be a "bright galaxy," but it is not a strong performer under bright skies. On a night with both moonlight and 光害, you might locate it -- but most of what makes it worth seeing will be gone.
Checking Moon Phase
For planning purposes, one of the most practical tools is the "Koyomi Keisan" (Calendar Calculations) page from the National Astronomical Observatory of Japan. It provides not only the moon phase but also moonrise and moonset times, so you can determine whether the moon will actually be above the horizon during your planned observing window -- far more useful than knowing the phase alone. Since moonlight directly dictates how much of M31 you can see, this level of detail pays off.
If you want an annual overview of new-moon dates for 2026, the NAOJ's official almanac for Reiwa 8 (2026) serves as a good starting point. Pick candidate dates from there, then cross-reference with the Koyomi Keisan page for moonrise and moonset on each specific night.
You do not need to restrict yourself to new-moon nights only. In practice, any evening when the moon is below the horizon during your observing hours works well. Checking a moon-phase calendar is a start, but following up with moonrise and moonset times will save you from wasted trips.
Choosing a Location
The first rule is to get away from urban areas. M31 spans roughly 4 degrees, but you can only appreciate that scale under dark skies. From a brightly lit train station or arterial road, binoculars will show you the core and nothing else -- hardly enough to understand why this target is special.
What you want is a dark site: rural countryside, a highland plateau, a coastline, or a mountain valley. More important than compass direction is making sure there are no major sources of light in the part of the sky where you will be looking. The locations I find most productive tend to have parking but minimal lighting, with an open vista -- highland meadows and coastal overlooks work well. Higher elevation can also help with transparency, and on a dry autumn night, that extra clarity makes M31's elongated outline easier to pick up.
In Bortle terms, Class 4 to 5 is a reasonable benchmark. At Class 6, you can find M31 but the experience is diminished. Above Class 7, conditions become genuinely difficult. The difference between Bortle classes is larger than the numbers suggest, and shifting even a short distance from town can transform your results. A practical on-site test: if you can see the Milky Way, conditions are likely good enough for a satisfying M31 observation.
Finding M31 with Binoculars: Star-Hopping from the Great Square
Step-by-Step Route
The most reliable way to get M31 into your binocular field is to follow a chain of bright stars, one hop at a time. Think of it not as searching for a galaxy, but as tracing a line of stars until a faint glow appears at the end. With 7x50 or 8x42 binoculars, a single field of view covers roughly 6 to 8 degrees, so at each step you can ask yourself whether the next guide star falls within the same field or just one nudge away.
- Locate the Great Square of Pegasus and start at Alpheratz.
Find the Great Square -- four stars forming a large rectangle in the autumn sky. The corner star on the northeast side is Alpheratz (Alpha Andromedae), and it doubles as the gateway into the Andromeda constellation. At observing events, people who try to jump straight to M31's position in the sky almost always get lost. Backing up to the Great Square resets everything.
- Hop from Alpheratz to Mirach.
Follow the chain of Andromeda's stars away from the Great Square. The next prominent star along that line is Mirach (Beta Andromedae). These two stars form the backbone of every M31 star-hop. Rather than memorizing them as isolated dots, think of them as links in a chain you are following. In binoculars, place Alpheratz at one edge of the field and slide until Mirach appears.
- Continue from Mirach toward Mu and Nu Andromedae.
From Mirach, push further along the chain toward Mu and Nu Andromedae. This is the last stepping stone before M31 itself, and it is where most beginners stumble. The temptation is to skip ahead, but jumping from bright star to bright star without tracking the fainter ones in between makes it easy to lose your bearings. Stay disciplined -- advance one field width at a time rather than swinging the binoculars in a broad sweep. It is slower, but far more reliable.
- Look for a faint elliptical glow near Mu and Nu.
Once you reach the Mu/Nu area, a soft, diffuse glow should appear nearby. That is M31. It will not look like a star -- expect a hazy, elongated smear with soft edges. If your first impression is "a thin sliver of cloud," that is perfectly normal. That is exactly what M31 looks like through binoculars. The Astronomical Dictionary of Japan gives M31 an apparent extent of about 4 degrees, so through binoculars the glow will spread well beyond the core.
- Confirm by checking for a "spread" rather than a point.
Right after acquisition, it is natural to wonder whether you are looking at the right thing. The test is simple: check which direction the light extends. M31 is an elongated ellipse, not a point source, so it looks fundamentally different from any star in the field. I consider the find confirmed not when I first notice a glow, but when I can tell that the glow has a surface -- that it is lit area, not a dot.
ℹ️ Note
AstroArts' M31 guide places the galaxy roughly 26.9 arcminutes west and 5 degrees 39 arcminutes north of Mirach. In the field, "a little west and noticeably north of Mirach" is a useful shorthand for adjusting your aim.
Backup Route from Cassiopeia
The Great Square route is the primary path, but depending on your orientation and horizon, Cassiopeia's "W" can offer an easier starting point. If the northern sky is clearly visible from your location, this backup route is worth knowing.
Cassiopeia's distinctive shape is one of the easiest asterisms to recognize, even for people still learning the constellations. Use the peaks of the W as a reference and sweep downward toward the Andromeda side of the sky to approach M31's neighborhood. When the Great Square route leaves you uncertain, coming at the problem from the opposite direction can resolve the ambiguity.
The strongest approach is to triangulate using both routes. Working from only one direction, it is hard to tell whether you have overshot or fallen short. Holding Cassiopeia's position in mind while star-hopping from the Great Square gives you a three-dimensional sense of where M31 sits. At observing events, I have seen people who are comfortable with the northern sky locate M31 faster starting from Cassiopeia.
Use whichever entry point feels more natural. From an open southern horizon, the Great Square is usually faster. If the northern sky dominates your view, start from Cassiopeia. The goal is not to memorize multiple routes -- it is to have one reliable entry point you will not lose track of.
Fine-Tuning from Mirach with an Offset
Once you can reliably place Mirach in your field, the final step is a small offset adjustment. The reference figure mentioned earlier -- roughly 26.9 arcminutes west and 5 degrees 39 arcminutes north of Mirach -- does not need to be memorized precisely, but it translates usefully into binocular terms.
With a 6-to-8-degree field, M31 sits roughly one field width north of Mirach, then slightly west. In practice: place Mirach near the bottom or southern edge of your field, slide upward, then nudge left. Beginners tend to confuse lateral directions at the eyepiece, so thinking "north first, then a small westward correction" as a two-step sequence reduces errors.
The key is not to rely on the offset numbers alone. The offset is a supplement; in actual use, tracking the star chain through Mu and Nu while approaching M31 produces fewer misses. Navigating purely by coordinate feel, without confirming the intervening stars, can land you in a featureless patch of sky. My own binocular routine is to follow the chain first and then "nudge a little west" as a final correction.
When M31 enters the field, it appears as a soft, elongated smear -- unmistakably different from the sharp star images around Mirach. Once you can make that distinction, the acquisition is complete. As your skills develop, you will find that regardless of whether you started from the Great Square or Cassiopeia, this Mirach-based fine-tuning becomes the most dependable final step.
What Does M31 Actually Look Like? Naked Eye, Binoculars, and Telescope Compared
Naked Eye
Through the naked eye, M31 does not look like a star. Under clear, dark skies, after tracing the Andromeda chain past Mirach, you will notice an extremely faint, smudge-like patch of light. The edges are undefined. You may find it easier to detect with averted vision -- looking slightly to the side rather than straight at it. At observing events, people often say they cannot find it; usually the issue is not that it is invisible, but that they are not accustomed to recognizing something that glows as a surface rather than a point.
The approach is the same star-hop described earlier: Great Square to Alpheratz, then to Mirach, onward to Mu/Nu, and finally to the M31 area. What matters is tracing the chain as a connected line, not picking out individual bright stars in isolation. Because M31 itself is so inconspicuous to the naked eye, you are really navigating the star pattern and then examining the sky at the end of that path.
On nights when Cassiopeia's W is prominent, using it to cross-check your position helps. Even when the primary Great Square route leaves you slightly uncertain, knowing roughly where M31 falls relative to Cassiopeia narrows the search area considerably. For naked-eye detection in particular, pinpointing the location through surrounding constellation geometry is more reliable than trying to spot the galaxy directly.
Binoculars
Binoculars transform M31 from a maybe-I-see-it smudge into something unmistakably galactic. The first surprise for most beginners is that even without spiral detail, an elongated elliptical glow clearly registers as a large-scale structure. The center is slightly brighter, tapering gradually into a softer halo on either side. Through 7x50 or 8x42 binoculars under dark skies, my first impression is always a long smear with a denser core -- not a wispy cloud, but something with substance that fades gently at the edges.
The star-hop stays the same -- Great Square, Alpheratz, Mirach, Mu/Nu, M31 -- and remains the least error-prone route. Binoculars offer a wide field, but sweeping randomly actually makes it easier to lose your place. Advance one field at a time along the star chain. If you feel uncertain past Mirach, re-identify Mu and Nu before looking for the faint ellipse beyond them. Keeping Cassiopeia in your mental map as a cross-check helps you judge whether you have gone too far or not far enough.
The binoculars best suited to M31 are low-magnification, wide-field designs. The 7x50, 8x42, and 10x50 come up repeatedly for good reason, with the 7x50 and 8x42 excelling at framing the full extent of the galaxy. Because M31's apparent size is so large, higher magnification does not necessarily help. Pushing the power up stretches the light over a larger image, which drops the surface brightness and causes the faint outer regions to dissolve into the background. Beginners instinctively assume bigger is better; with M31, making it bigger also makes it fainter.
💡 Tip
What keeps M31 visible in binoculars is not magnification but the ability to fit the entire shape in one view. Framing Mirach and the Mu/Nu chain alongside the galaxy gives you both a navigation anchor and a more stable acquisition.
At 10x, hand tremor starts to become noticeable, and for a faint extended object like M31, a still image versus a shaking one can mean the difference between seeing the outer glow and missing it. I have repeatedly found that the same binoculars reveal noticeably more structure the moment I brace against something solid. With M31, the deciding factor is not raw magnification -- it is whether you can hold the wide field steady long enough for the faint details to register.
Telescope
A telescope brings out the brightness of M31's core. The broad, elongated shape you saw through binoculars gives way to a prominent nucleus surrounded by a concentrated inner region -- the eye is drawn inward. This has its own appeal, but beginners often feel disoriented because the full extent of the galaxy no longer fits in a single field. The telescope view feels less like "seeing a galaxy" and more like "peering into the center of one."
The star-hop to locate M31 does not change: trace the chain from the Great Square through Alpheratz and Mirach to Mu/Nu, lock in the position, then look through the eyepiece. Use the ファインダー or a low-power アイピース to follow the star chain before centering the core and increasing magnification as desired. Cross-referencing with Cassiopeia helps maintain spatial awareness even through a narrow field.
Low power remains valuable here, too. Starting at high magnification scatters M31's light across the field, dropping surface brightness and making the outer halo harder to detect. When a telescope view of M31 feels underwhelming, the usual cause is not equipment limitations but trying to observe a large, faint target through a small window. M31 is not a target that automatically impresses at any magnification. On some nights, binoculars deliver a more immediate sense of the galaxy's shape.
Why Photos and Visual Observation Look So Different
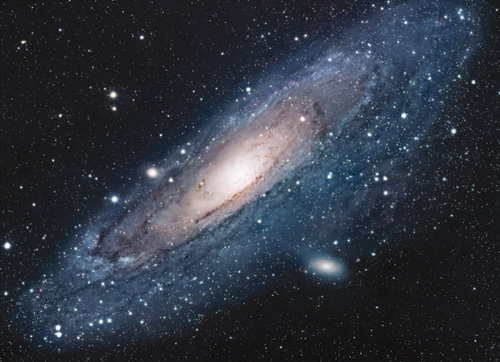
The biggest expectation gap with M31 is the difference between photographs and what your eyes actually see. Photographs can reveal spiral arms in blue-white hues, reddish star-forming regions, and intricate dust lanes. None of that registers visually. This is not a failure of observation -- it is a fundamental difference in how light is captured.
A camera accumulates light over a long exposure, building up signal from regions too faint for the eye to detect in real time. Stacking multiple frames and adjusting contrast further separates the core from the faint outer structure. The human eye processes incoming photons on the fly, with no ability to integrate signal over seconds or minutes. That is why the naked eye sees "a faint smudge," binoculars reveal "an elongated elliptical glow," and a telescope highlights "a bright core."
Color is another mismatch. In dim conditions, your vision relies primarily on rod cells, which are sensitive to low light but largely insensitive to color. M31 appears as a whitish-gray glow in the eyepiece; the vivid blues and golds of photographs simply do not appear. The first time I saw M31 under genuinely dark skies, the view was far more subdued than any photo had led me to expect -- yet the realization that I was watching a galaxy 2.5 million light-years away materialize at the end of a star-hop gave the experience a weight that no photograph had matched.
Recommended Binocular Specs and How to Choose
Exit Pupil and Low-Light Performance
Choosing binoculars for M31 based on magnification alone will steer you wrong. What actually matters is a combination of low power and wide field for framing the full galaxy, plus enough light-gathering ability for your eyes to work comfortably in the dark. The metric that captures this is the exit pupil -- calculated as objective diameter divided by magnification.
In darkness, the human pupil dilates to roughly 5 to 7 mm. An exit pupil of 5 mm or larger ensures efficient light transfer for faint, extended objects like M31. An 8x42, for instance, delivers 5.3 mm -- right in the sweet spot. A 7x50 gives about 7.1 mm, and a 10x50 gives 5.0 mm, so all three models under discussion here meet the baseline for dark-sky observing.
A bright image and a good image are not quite the same thing, though. Naked-eye M31 is a faint smudge; binoculars bring it to life as an elongated elliptical glow; a telescope tends to emphasize the core at the expense of the halo. Rather than chasing dramatic spiral structure, the more productive question is "which instrument reveals the galaxy's shape most naturally?" At observing events, I almost always recommend a 7x or 8x pair as a first binocular. M31 is a sprawling target, so the priority is letting that full extent register comfortably across your field of view.
7x50 Characteristics
7x50 is the classic entry point. At 7x, the image stays composed even handheld. A 50 mm objective and an exit pupil of about 7.1 mm provide generous light throughput, and through binoculars the faint glow firms up a clear step beyond what the naked eye shows. For a target as extended as M31, this combination of stability and breadth is exactly what you need.
Looking through a 7x50, I find M31's full profile easiest to grasp. A wide-field model frames the galaxy's elongated stretch with room to spare, and the generous field also makes star-hopping from Mirach straightforward -- beginners are less likely to lose their place mid-chain. At the "finding" stage, the confidence a 7x50 provides is hard to beat.
The visual impression tends toward a slightly brighter core with faint extensions trailing off on either side -- an unmistakable galaxy-like shape that comes through well on-site. The tradeoff is that the companion galaxies and fine core detail benefit from a bit more magnification. Even so, as a first binocular for M31, the 7x50's honest wide-field performance aligns perfectly with what this target demands: a broad view that lets the galaxy speak for itself.
8x42 Characteristics
8x42 strikes a balance between aperture and portability that is hard to fault. The exit pupil is 5.3 mm -- comfortably above the dark-sky threshold -- and the smaller form factor compared to a 7x50 makes it easier to grab on the way out the door. It doubles well for general sky-sweeping, so it is unlikely to gather dust between M31 sessions.
Optically, 8x42 sits between 7x50 and 10x50: slightly more magnification than the former, without the sensitivity to hand tremor of the latter. M31's overall shape remains visible while the brighter core gains a touch more definition. Handling, stability, and portability are all in a comfortable range, and at observing events I find 8x42 to be the most universally agreeable size class. It suits observers who want something less bulky than a dedicated astronomy binocular but still capable under dark skies.
M31's 4-degree span fits well within an 8x42's field. What was a vague naked-eye presence becomes a cohesive elliptical glow with clear directionality. The magnification is not greedy enough to thin out the surface brightness, yet it does not leave you wanting more. Within the recommended 7x50 to 10x70 range, the 8x42 lands closest to the sweet spot for the widest range of observers.
10x50 Characteristics
10x50 offers the most magnification of the three. The exit pupil is 5.0 mm -- still on the right side of the dark-sky threshold -- and the extra power can bring out the core's central condensation and, under good conditions, make the companion galaxies M32 and M110 easier to separate from the main body.
The tradeoff is real, though. At 10x, the field narrows and hand tremor becomes a significant factor. M31 is not a point source; it is a faint, extended glow, and even minor image shake causes the edges to blur into the background. I have had sessions where a handheld 10x50 showed "only the core," yet bracing my elbows on a surface immediately brought the outer extensions into view. The gap between spec-sheet performance and actual performance is larger with this class than with 7x or 8x, and it comes down almost entirely to how still you can hold the image.
The view itself is rewarding. The core has more presence, and the spatial relationship between M31 and its companions becomes easier to read. Still, M31's appeal is not confined to the nucleus -- the long, stretched body is a major part of the experience. For handheld use, 10x50 is not automatically the best first choice. A fair summary: 7x50 or 8x42 for the big picture, 10x50 for a closer look -- provided you can keep it steady.
Reducing Hand Shake
With M31, a still image matters more than higher magnification. This applies across the board -- 10x obviously, but even 7x50 and 8x42 benefit from reduced tremor during extended viewing. A faint elliptical glow changes character the moment the image stabilizes. Nights when I thought "M31 isn't showing much" have turned around just from adjusting my posture.
The simplest fix is bracing your elbows -- on a car roof, a railing, the armrest of an observing chair. Leaning your back against a wall anchors your head and shoulders, and the difference in image steadiness is immediate. Even this minimal effort lets the core settle and the outer extensions become traceable.
For more stability, a binocular tripod adapter is the next step. Most use the standard 1/4"-20 camera thread, so they pair easily with any tripod or monopod. On Amazon, for example, the Vixen Bino Holder H lists around 1,000 yen (~$7 USD) and a universal-fit option like the Snapzoom at about 4,590 yen (~$30 USD). Mounting the binoculars frees you to study faint detail that vanishes under handheld shake.
If a full tripod feels like overkill, a monopod is a practical middle ground. Just taking the weight off your arms reduces vertical bounce, and 10x50 users see the biggest improvement -- a jittery core image suddenly locks into place. M31 is not a target that rewards cranking up the magnification. The payoff comes from keeping a low-power, wide-field view steady enough to capture the faintest light.
ℹ️ Note
The biggest visual gains with M31 come not from higher power but from longer moments of stillness. Even without a tripod, an elbow rest or monopod can make the faint tips of the elliptical glow visible.
Can You See M32 and M110 Too? Tips for Enjoying the Companions
Finding M32 (NGC 221)
Once you have M31 in your binoculars, the companion galaxies nearby become the natural next target. With a wide-field instrument, M31, M32, and M110 can all fall within the same field of view -- and that is where the observation deepens. I recall an evening under dark suburban skies when, while studying M31's core region, I noticed "another small spot of light" sitting close by. That was M32.
M32 (NGC 221) sits not far from M31's center. Visually, the best description is a small, round luminous patch. Unlike M31's elongated profile, M32 appears as a compact, slightly fuzzy dot -- a tiny concentrated smudge. Its apparent size is roughly 8 by 6 arcminutes, which through binoculars registers as a small, self-contained glow.
To find it, center M31's brightest region in your field and look for a small, independent bright spot nearby. It can blend into M31's halo at first, but as the image settles, you will notice a distinct round concentration separate from the main body's diffuse glow. A 10x50 or similar slightly higher-magnification binocular makes this separation easier to perceive.
Finding M110 (NGC 205)
M110 (NGC 205) is the harder catch. The difficulty is not so much about faintness as about how its light is spread -- it is a diffuse, low-surface-brightness glow that disappears into a bright sky background. The visual impression is a smaller, fainter echo of M31 itself: an elongated elliptical hint rather than the compact dot of M32.
M110 lies on the opposite side of M31's core from M32, a bit farther out. Having the spatial layout in mind beforehand helps: picture M31 as the large ellipse, M32 as a small circle near the center, and M110 as a faint ellipse off to one side. In practice, M32 usually jumps out first, while M110 lingers in the "I think I see something" zone for a while. Holding the field steady and using averted vision -- shifting your gaze slightly off-target -- coaxes M110's glow out of the background.
All three are within binocular range, but the companions are fainter and therefore more demanding. M32 (NGC 221) is roughly 等級 8 with an apparent size of about 8 by 6 arcminutes; M110 (NGC 205) is about 等級 9 with an apparent size of roughly 20 by 10 arcminutes. M110's lower surface brightness in particular means that sky darkness and image stability affect its visibility far more than they do M31 itself.
Tips for Enjoying All Three in One Field
The real pleasure of this trio is not finding each galaxy individually but building a mental map with M31 at the center. Start with the large ellipse of M31, then pick out the round dot of M32 nearby, then look for the fainter elliptical hint of M110 a bit farther away. Working through this sequence turns a single bright smudge into a tableau of extragalactic neighbors. At observing events, this is the moment that shifts the experience from "I saw a faint blob" to "I saw a family of galaxies beyond the Milky Way."
Binoculars are ideal here because their wide field lets you frame M31 and both companions in a single view. A 7x pair can sometimes fit the group, but for separating the companions as distinct objects, 10x50 or similar gives you an edge. In my experience, 7x50 and 8x42 excel at the overall scene, while 10x50 makes M32 and M110 register more clearly as separate entities. The tradeoff is that higher magnification amplifies shake, so the stabilization techniques from the previous section become directly relevant here.
M110 in particular may be sitting in your field without you realizing it. Rather than hunting for it actively, try relaxing your focus away from M31's core and letting your awareness drift outward. Holding the descriptions in words -- "M32 is a small round glow, M110 is a faint miniature M31" -- primes your visual system to recognize what is actually there. Once you are comfortable with M31, spending time with all three as a group becomes the most rewarding part of the session.
💡 Tip
After locating M31's core, resist the urge to search randomly for the companions. Work outward in order -- "round M32 near the center, then faint elliptical M110 farther away" -- and you are much less likely to lose your place.
Observing Tips and Common Mistakes
Building Dark Adaptation
The single most common way beginners undercut their M31 experience is starting the search before their eyes have adjusted to the dark. A faint galaxy can be sitting right in the field of view and remain invisible to unadapted eyes. After arriving at your site, plan on spending 20 to 30 minutes in darkness before serious observing. I have lost count of the nights when the sky seemed washed-out on arrival, only for M31's core glow to sharpen noticeably after I gave my eyes time to catch up.
The way to protect that adaptation time is simple: avoid bright light. If you need your phone, switch it to red-screen mode and avoid looking at it directly. When checking a star chart, hold it below your line of sight and glance at it briefly. A single full-brightness screen flash can reset minutes of progress, and the recovery wait is frustrating.
Use the first 20 to 30 minutes to handle logistics -- adjusting equipment, putting on extra layers, confirming your plan. Save the actual sky-scanning for after your eyes have settled in. Dark adaptation is not a special skill; it is the foundation for seeing faint targets. Get this one thing right and "I couldn't see anything" outcomes drop dramatically.
Averted Vision and Field Sweeping
M31's core is relatively easy to spot, but the impression through binoculars improves substantially when you look slightly off-center rather than straight at it. This technique -- averted vision -- means keeping the target in your field of view but shifting your gaze just off to the side. Beginners who stare intensely at the center often find the view getting worse, not better. For faint objects, the instinct to look harder works against you.
In practice, keep M31's core in the field while letting your line of sight drift a fraction to one side. The elongated glow flanking the nucleus becomes more apparent almost immediately. At observing events, people who try this for the first time frequently say the galaxy "suddenly got bigger."
A second technique that helps is field sweeping: not a wide swing of the binoculars, but a very slight oscillation that shifts the target within the field by a small amount. A stationary faint smudge blends into the background, but a gently moving one triggers your brain's motion-detection pathways, making the glow easier to register. When M31 is in the field but the edges feel indistinct, alternating between holding still, nudging gently, and applying averted vision can pull detail out of the noise.
ℹ️ Note
With M31, the gap between "found it" and "seeing it well" is where technique matters most. Easing your gaze off-center and introducing a tiny field sweep brings out the faint outer extensions that direct staring hides.
Avoiding Moon and Artificial Light
For M31, managing moonlight and artificial light has a bigger impact on your results than binocular choice. The galaxy is a broad, faint surface -- not a sharp point -- so any rise in sky background washes out contrast. If the position seems correct but the view is thin, the problem is usually not your star-hop; it is a bright sky.
On-site, turn your back to streetlights, parking-lot lights, and passing headlights. Standing with a light source in front of or beside you degrades dark adaptation and can throw stray light across your objective lenses. A technique I use regularly is to position myself in the shadow of a building, a pavilion roof, or even a parked car, keeping only the target direction dark. It sounds minor, but this alone can restore enough contrast to bring M31's core back into visibility.
When you cannot eliminate a nearby light source, adjust your standing position rather than your aim. Moving a few meters can drastically reduce the stray light entering your eyes. You cannot change the sky, but you can change where you stand relative to local light sources. Beginners tend to evaluate a location by looking up; in practice, "where you observe from" matters as much as the sky overhead.
Practical Hand-Shake Reduction
Faint extended targets like M31 lose definition the moment the image shakes. Even at moderate magnification, small vibrations cause the glow's edges to dissolve. The solution is not muscular effort but increasing the number of support points for your body.
The quickest improvement comes from bracing your elbows. Instead of holding the binoculars out in front of your chest with your arms floating, tuck your elbows against your ribcage or rest them on something solid. Sitting down in any stable chair is another instant upgrade -- add a backrest and your head steadies too, making it far easier to hold M31 in the same part of the field. Leaning against a wall eliminates upper-body sway and lets you park the core image in one spot.
For longer sessions, the tripod adapter discussed earlier pays dividends. Detail that registers as "maybe I saw it" handheld becomes confirmable once the binoculars are locked down. This is especially true at 10x, where a jittery image can obscure the elliptical outline entirely; mounting the binoculars often makes the galaxy's shape snap into focus for the first time. Shake reduction is not just about comfort -- it is a technique that shifts the boundary between visible and invisible.
The Right Mindset for Star-Hopping
The most common beginner mistake is trying to find the galaxy directly. M31 is famous enough that the temptation is to scan for "a fuzzy ellipse" somewhere in the sky, but this approach leaves you unsure of where you are actually looking. Binocular acquisition works far better when you treat it as tracing a star pattern accurately, not hunting for the target itself.
Start at the Great Square of Pegasus, move to Alpheratz, then Mirach, and from Mirach follow the Mu/Nu chain carefully. At each step, M31's position in the field becomes increasingly concrete. Avoid broad sweeps. Moving one field at a time along a confirmed chain of stars is slower but overwhelmingly more reliable.
The people who struggle at observing events are almost always skipping intermediate confirmation steps. After reaching Mirach, resist the urge to leap straight to the galaxy. Instead, verify at each hop that the stars you see match the pattern you expect. M31's surface brightness is low enough that being off by just a few degrees puts you in blank sky. The right mental model for the star-hop is not "galaxy hunt" -- it is pattern tracing, step by step.
Once this approach clicks, M31 becomes reproducible. You can return to it night after night using the same sequence. Observers who internalize the chain, rather than relying on a lucky sweep, consistently find M31 faster on subsequent attempts.
Tonight's Checklist and Next Steps
Before heading out, take a quick look at a star chart or app to confirm where the Great Square of Pegasus and Cassiopeia will be in tonight's sky. Pre-focusing your binoculars on a distant daytime object is also worth the few minutes -- adjust not only the central focus but also the diopter ring so both eyes see a sharp image. Fumbling with focus in the dark is a surprisingly common reason for a disappointing session; it is not always the sky's fault.
💡 Tip
Tonight, five checks are all you need: "Is it close to new moon?" "Will the moon be below the horizon during my session?" "Do I have a safe, dark site?" "Have I confirmed M31's position on a chart?" "Is my binocular focus dialed in?"
Once you have M31 under your belt, branching out to other accessible deep-sky targets will open up binocular astronomy considerably. Building your equipment knowledge -- stabilization methods, binocular selection, field technique -- will sharpen every future session. For further reading, the site has related guides (for example, an observation guide for the Orion Nebula M42, and a dark-sky site profile for Shirabiso Highland: /spot/shirabiso-highland). Tonight, do not aim for perfection. Aim to own one repeatable routine.
Related Articles
How to Start Stargazing: 5 Steps You Can Do Tonight
How to Start Stargazing: 5 Steps You Can Do Tonight
You don't need a telescope to start stargazing. Begin with bright, easy targets like the Moon and Venus, then gradually add binoculars and — if you want — a telescope. Starting with naked-eye objects and building from there is the approach least likely to leave you discouraged.
Top 20 Stargazing Spots in Japan: A Beginner's Comparison Guide
Top 20 Stargazing Spots in Japan: A Beginner's Comparison Guide
Picking a stargazing spot by reputation alone can lead to disappointment. This guide compares 20 stargazing locations across Japan by sky darkness, accessibility, observation style, and beginner-friendliness — so you can find the one that actually fits your trip.
How to Find Constellations: The Fastest Route Through All Four Seasons
How to Find Constellations: The Fastest Route Through All Four Seasons
The fastest way to learn the night sky isn't memorizing all 88 constellations at once — it's finding one obvious seasonal landmark and working outward from there. Step outside around 9 PM, face south, and start with the Big Dipper in spring, the Summer Triangle in summer, the Great Square in autumn, and Orion in winter.
6 Best Stargazing Apps — Free AR and Offline Options Compared
6 Best Stargazing Apps — Free AR and Offline Options Compared
Stargazing apps may look similar on the surface, but take them out under a real night sky and the differences become clear — how much you can do for free, how readable the AR overlay is when you hold your phone up, and whether the app still works when cell signal drops out.